gunks climbing guide

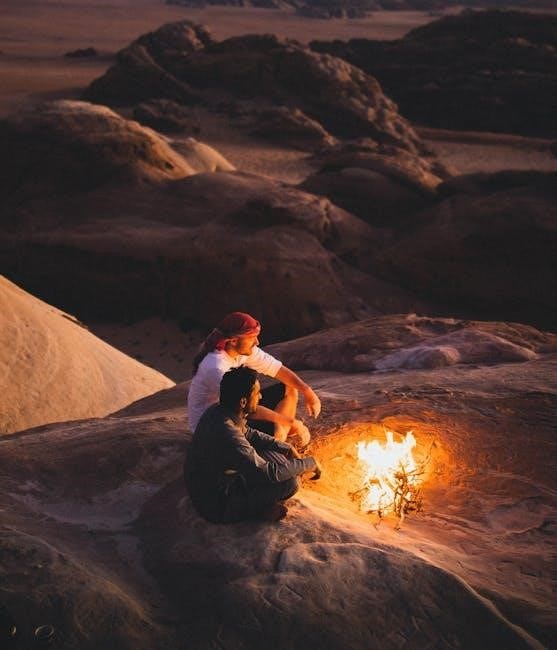
The Gunks, a renowned climbing destination, presents unique challenges and rewards for all skill levels; understanding its history and grading is key.

Climbing terminology can be daunting, but mastering the basics unlocks access to this incredible sport and its vibrant community.

Deep learning is being utilized to standardize route evaluation, aiming for a more objective and consistent difficulty grading system.

Outdoor Action provides a safe and supportive environment for students to explore climbing, fostering both physical and mental growth.

History of Gunks Climbing

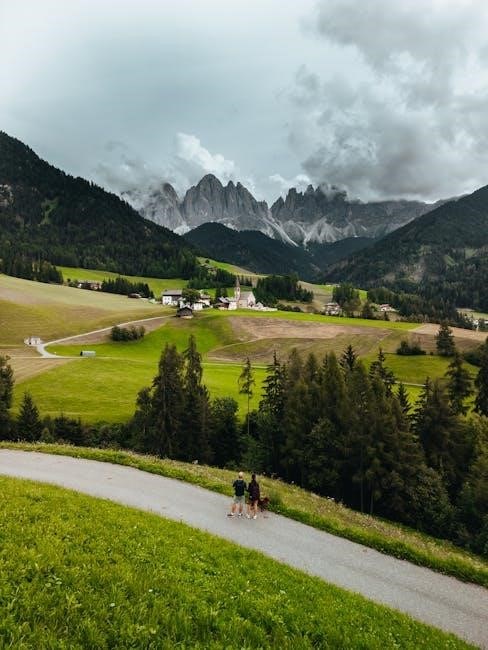
The Shawangunk Ridge, affectionately known as “The Gunks,” boasts a rich climbing history dating back to the early 20th century. Initial exploration focused on simple ascents, but the 1950s marked a turning point, witnessing the development of harder routes and the establishment of a dedicated climbing community.

Early pioneers like Fritz Wiessner and Hans Kraus pushed boundaries, establishing many of the classic lines still climbed today. The Gunks quickly became a proving ground for American climbing, attracting enthusiasts eager to test their skills on its unique, steep, and fractured quartzite cliffs.

The area’s relatively moderate climate and accessible location further fueled its popularity. Over decades, generations of climbers have contributed to the Gunks’ legacy, continually adding new routes and refining techniques. Today, it remains a globally recognized and cherished climbing destination.

Geological Formation of the Shawangunk Ridge

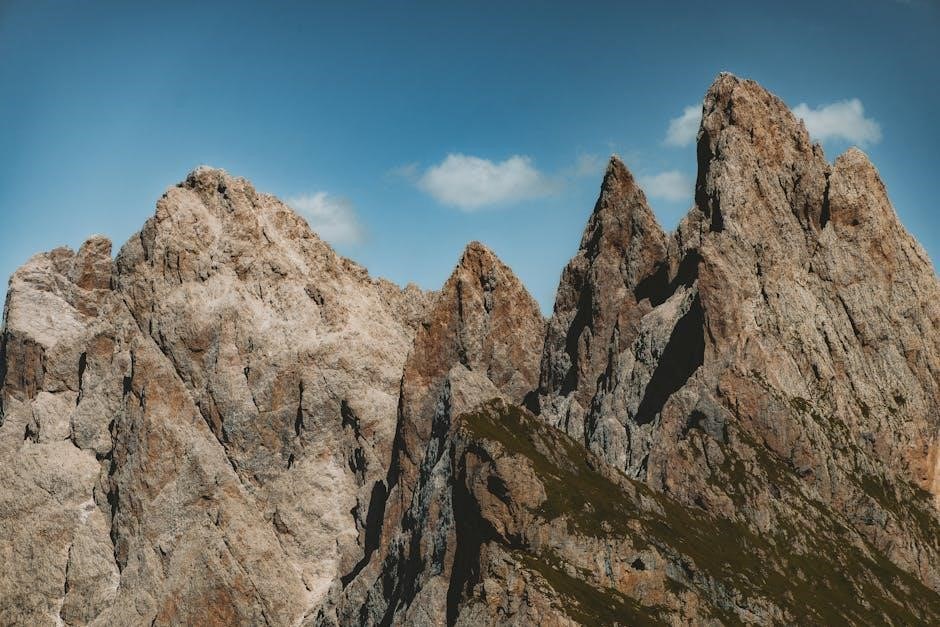
The Shawangunk Ridge is a dramatic geological feature formed over millions of years. Its foundation lies in the ancient, resistant quartzite bedrock, a metamorphic rock created from sandstone under intense heat and pressure during the Ordovician period, roughly 480 million years ago.

Subsequent uplift and erosion sculpted the landscape, exposing the quartzite cliffs we see today. Glacial activity during the last ice age further shaped the ridge, carving out valleys and leaving behind distinctive features. The unique fracturing and jointing patterns within the quartzite are crucial.

These fractures create the holds and cracks that climbers utilize, defining the Gunks’ characteristic climbing style. The ridge’s geological history is directly responsible for its challenging and rewarding climbing opportunities, making it a unique and treasured landscape.

Getting Started: Skill Levels & Preparation

Beginner climbers should focus on foundational skills and proper gear; the Gunks offer diverse routes for all levels, demanding thorough preparation and knowledge.

Beginner Climbing Areas in the Gunks

For novice climbers, several areas within the Shawangunks provide excellent introductory experiences. The Trapps, while iconic, also features easier routes perfect for building confidence and technique. Look for climbs graded 5.4 to 5.7 in this area, focusing on well-protected lines.

Peter’s Kill offers a quieter alternative, with some gentler slabs and cracks suitable for beginners. However, route finding can be more challenging here, so a guidebook is essential. Millbrook Mountain also presents options, though access can be a bit more involved.

Remember to start with top-roping before venturing into lead climbing. Always climb with a knowledgeable partner and prioritize safety. These areas allow new climbers to experience the unique Gunks climbing style in a controlled and supportive environment, fostering a love for the sport.

Essential Climbing Gear for the Gunks

Climbing the Gunks demands specific gear for safety and enjoyment. A helmet is non-negotiable, protecting against rockfall – a common occurrence. Harnesses should be comfortable and properly fitted, alongside a dynamic climbing rope (typically 60-70 meters).

Quickdraws are crucial for clipping into bolts, and a selection of slings and cordalettes is vital for building anchors. Belay devices (ATC or GriGri) and a locking carabiner are essential for safe belaying. Don’t forget climbing shoes suited to the Gunks’ unique rock type.

Consider bringing a first-aid kit, headlamp, and appropriate clothing layers. A guidebook and map are invaluable for navigation. Remember, quality gear is an investment in your safety and a more rewarding climbing experience.

Understanding Climbing Grades in the Gunks

The Gunks primarily utilizes the YDS (Yosemite Decimal System) for grading difficulty. This system ranges from 5.0 (easiest) to 5.15d (hardest). Gunks climbing is known for its technical nature, meaning a 5.8 here can feel harder than elsewhere.

Grades are subjective, and recent research explores using deep learning to standardize evaluations and reduce bias. However, currently, understanding the nuances is key. A “+” indicates a climb is harder within a grade, while a “-” is easier.

Pay attention to guidebook descriptions; they often include notes on style (slab, crack, face) and protection quality. Experience and local knowledge are invaluable for accurately assessing a route’s difficulty.

Popular Climbing Areas & Routes

The Gunks boast diverse areas like the Trapps, Millbrook, Peter’s Kill, and Manawus, offering routes for every climber, from beginner to expert.

The Trapps: A Gunks Classic

The Trapps represent the heart of Gunks climbing, famed for its long, traditional routes and stunning views. This area is historically significant, attracting climbers for generations with its challenging yet rewarding terrain. Expect mostly crack and slab climbing, demanding solid technique and gear placement skills.

Beginners will find introductory routes, while experienced climbers can tackle multi-pitch adventures. Popular climbs include “High Exposure,” a moderate multi-pitch, and numerous single-pitch options along the main cliff. The Trapps often experience crowds, especially on weekends, so consider weekday visits or early starts.

Access is managed to preserve the environment, so be mindful of regulations and practice Leave No Trace principles. The area’s exposure to the elements requires careful weather assessment before embarking on any climb.

Millbrook Mountain: Diverse Climbing

Millbrook Mountain offers a fantastic variety of climbing styles, making it a favorite among Gunks enthusiasts. Unlike the predominantly vertical Trapps, Millbrook features more overhanging sections and diverse rock formations. This translates to a broader range of challenges, from technical face climbing to powerful roof pitches.

Routes cater to all levels, with options for beginners seeking moderate climbs and experts aiming for demanding projects. The area is known for its well-protected routes, but solid crack climbing skills are still highly valuable. Expect a slightly less crowded experience compared to the Trapps.

Consider bringing a full rack of gear, as route protection can vary. Millbrook’s varied terrain demands adaptability and a willingness to explore different climbing techniques.

Peter’s Kill: Challenging Routes

Peter’s Kill is notorious for its demanding and sustained climbing, attracting experienced Gunks climbers seeking a serious test of skill. The area is characterized by steep, technical routes requiring precise footwork, powerful moves, and excellent crack climbing technique. Expect long, committing lines with sparse protection in places.

Routes here often involve intricate sequences and demanding stemming, making them physically and mentally challenging. This area isn’t ideal for beginners; a solid foundation in climbing fundamentals is essential. Prepare for a full-day adventure, as descents can be time-consuming.

Bring a comprehensive rack, including offset sizes, and be prepared for a rugged approach.

Manawus: Less Crowded Options

Manawus offers a welcome respite from the often-crowded areas of the Gunks, providing a more secluded climbing experience. While not boasting the sheer scale of the Trapps or Peter’s Kill, Manawus presents a diverse range of routes, particularly suited for intermediate to advanced climbers. Expect a mix of crack, face, and slab climbing, often with a more moderate angle than other areas.

The approach is generally shorter and less strenuous, making it a good choice for a quick day trip. However, routes can still be challenging, requiring solid technique and route-finding skills.

Manawus is a fantastic option for those seeking quality climbing with a bit more peace and quiet.

Climbing Techniques Specific to the Gunks

The Gunks demand specialized techniques; mastering slab, crack, and face climbing is crucial for success on its unique, often technical, sandstone formations.

Slab Climbing Techniques

Slab climbing in the Gunks requires a unique skillset, emphasizing precise footwork and body positioning. The low-angle nature of many Gunks slabs demands exceptional friction and trust in your rubber.

Footwork is paramount; focus on edging – utilizing the very tips of your climbing shoes – and smearing, applying a broad surface area to the rock for maximum contact. Maintain a low center of gravity, keeping your hips close to the wall to maximize stability.

Body positioning is equally critical. Flagging – extending a leg to counterbalance movement – is frequently employed to prevent barn-dooring (swinging outwards). Avoid pulling with your arms; instead, rely on your legs to drive upwards, maintaining a straight-line body position. Practice stemming, using opposing forces to create stability on wider slabs.

Mental fortitude is key; slab climbing can feel insecure, so cultivate confidence and trust in your technique. Slow, deliberate movements are far more effective than rushing.

Crack Climbing Techniques

Crack climbing is a Gunks staple, demanding specialized techniques and gear. The Shawangunks offer a variety of crack sizes, from thin finger cracks to wide off-widths, each requiring a different approach.

Hand jams involve inserting the hand into the crack and creating friction by twisting and locking the wrist. Finger locks utilize similar principles, but with smaller holds. Foot jams are crucial for support, wedging the foot securely into the crack.

Camming devices are essential for protection, placed within the crack to arrest a fall. Proper placement is vital; ensure the cam is solid and won’t walk out. Fist jams and chimneying are advanced techniques for wider cracks.

Practice is key to mastering crack climbing; develop the strength and technique to efficiently utilize these holds and placements.

Face Climbing Techniques

Face climbing at the Gunks requires precise footwork and body positioning. Unlike crack climbing, holds are smaller and less defined, demanding efficient movement and strength.

Edging utilizes the outside or inside edge of the climbing shoe to maximize contact with small holds. Smearing involves applying friction between the rubber and the rock surface, relying on the stickiness of the shoe.

Flagging extends a leg to the side for balance, counteracting outward pull. Heel hooks and toe hooks engage the heel or toe to pull the body closer to the wall. Dynamic movement, or reaching, is often necessary.

Core strength is crucial for maintaining body tension and preventing barn-dooring. Practice precise foot placements and efficient weight transfer for success.

Safety Considerations in the Gunks

Prioritize safety through diligent anchor assessment, rope management, and belaying techniques; always be aware of changing weather conditions and potential hazards.

Anchor Building & Assessment

Establishing secure anchors is paramount in Gunks climbing, given the traditional nature of many routes. Thoroughly evaluate existing placements – nuts, cams, and bolts – for solidity and redundancy. Understand equalization techniques to distribute load effectively between multiple points, minimizing stress on any single piece. Always back up natural anchors with artificial protection.

Regularly assess your anchor throughout the climb, checking for movement or signs of wear. Learn to identify potential failure points and proactively address them. Practice building anchors in a controlled environment before attempting them on the cliff. Remember, a poorly constructed anchor can have catastrophic consequences. Double-check everything before committing your weight.

Utilize appropriate materials and techniques for the specific rock type and conditions. Consider potential shock loading and build accordingly. Never assume an anchor is safe; always verify its integrity yourself.

Rope Management & Belaying

Efficient rope management is crucial for a safe and enjoyable Gunks climbing experience. Minimize rope drag through careful clipping and strategic use of extensions. Master various belay techniques, including assisted-braking devices, and understand their proper application. Always maintain a firm grip on the brake strand and pay constant attention to the climber.

Communicate clearly with your climbing partner using established commands. Anticipate the climber’s movements and be prepared to react quickly. Regularly check the rope for abrasion or damage. Understand the importance of a dynamic belay to absorb potential falls.

Practice proper rope handling techniques, such as flaking and coiling, to prevent tangles and ensure smooth feeding. Never belay from an unstable position.

Weather Awareness & Hazards

The Gunks’ weather can change rapidly, demanding constant vigilance. Monitor forecasts before and during your climb, paying attention to temperature shifts, wind speed, and precipitation. Be prepared for sudden storms, even on seemingly clear days. Lightning is a serious hazard; descend immediately if thunder is heard.

Rockfall is a persistent threat; wear a helmet and be aware of climbers above. Loose rock is common, especially after rain or freeze-thaw cycles. Be mindful of wasp nests, particularly in warmer months. Hypothermia and heat exhaustion are potential risks; dress appropriately and stay hydrated.

Fog can reduce visibility, making route finding difficult. Always have an escape plan in case of inclement weather.

Gunks Climbing Ethics & Regulations

Respect the environment and adhere to Leave No Trace principles. Support Access Fund and local stewardship efforts to preserve climbing access and protect this unique area.

Leave No Trace Principles

Preserving the Gunks’ natural beauty is paramount for continued access. Leave No Trace principles are crucial for minimizing our impact. Plan Ahead and Prepare: know regulations and weather. Travel and Camp on Durable Surfaces: utilize established trails and campsites.

Dispose of Waste Properly: pack out everything you pack in, including human waste. Leave What You Find: avoid disturbing plants, rocks, or cultural artifacts. Minimize Campfire Impacts: consider using a stove instead. Respect Wildlife: observe from a distance and never feed animals.

Be Considerate of Other Visitors: minimize noise and yield to others on the trail. By diligently following these guidelines, we ensure the Gunks remain pristine for future generations of climbers and nature enthusiasts. Responsible climbing is sustainable climbing.

Access Fund & Local Stewardship

Maintaining access to the Gunks relies heavily on the collaborative efforts of organizations like the Access Fund and dedicated local stewardship groups. The Access Fund champions climber rights and advocates for responsible recreation nationwide, providing crucial resources for land management partnerships.

Local stewardship, spearheaded by groups like the Mohonk Preserve, focuses on trail maintenance, habitat restoration, and educating climbers about responsible practices. Volunteer opportunities abound, allowing climbers to directly contribute to the preservation of this iconic area.

Financial support through memberships and donations is vital. Active participation in these initiatives ensures continued climbing access and protects the Gunks’ unique ecological and recreational value for years to come. Support those who support our climbing!

Seasonal Closures & Restrictions

The Gunks experience varying restrictions throughout the year to protect sensitive nesting bird populations, particularly during the spring and early summer months. Specific cliffs and routes may be temporarily closed, and climbers are legally obligated to adhere to these regulations.

Peregrine falcon nesting season is a primary concern, often resulting in significant closures from February through August. Mohonk Preserve and the New York State Department of Environmental Conservation post updated closure information online and at trailheads.

Respecting these closures is crucial for the long-term health of the ecosystem and continued climbing access. Ignorance of restrictions is not an excuse, and violations can result in fines or loss of climbing privileges. Always check current conditions before heading out!

Resources for Gunks Climbing

Comprehensive guidebooks and maps are essential for navigating the Gunks; online forums connect climbers, while local shops offer gear and guided experiences.

Guidebooks & Maps

Navigating the Gunks requires reliable resources, and guidebooks remain the cornerstone of planning any climbing trip. Several excellent publications detail the routes, approaches, and descent information for each area. “Gunks Guide” by the Shawangunk Climbers Coalition is a frequently updated and highly recommended resource, offering detailed topos and crucial access information.

Local climbing shops also stock a variety of guidebooks and maps tailored to different skill levels. Don’t underestimate the value of a physical map, especially considering cell service can be spotty in certain areas of the ridge. Topographical maps can aid in understanding the terrain and planning efficient approaches. Remember to always check for the most recent edition of any guidebook, as routes can change or be closed due to environmental factors or maintenance.

Online Climbing Forums & Communities

Supplementing guidebooks with online resources provides up-to-date conditions and beta. Several active online climbing forums and communities focus specifically on the Gunks, offering a platform for sharing information and connecting with fellow climbers. Mountain Project is a popular website with detailed route information, user comments, and recent trip reports.

Facebook groups dedicated to Gunks climbing are also valuable for quick condition updates and finding climbing partners. These communities often share information about closures, trail conditions, and potential hazards. Remember to critically evaluate information found online and cross-reference it with reliable sources. Engaging respectfully with these communities fosters a positive climbing environment and ensures responsible access.

Local Climbing Shops & Guides

New Paltz, the gateway to the Gunks, boasts several excellent climbing shops offering gear sales, rentals, and expert advice. These shops are invaluable resources for beginners and experienced climbers alike, providing access to the latest equipment and local knowledge. Rock and Snow is a well-established shop with a long history of serving the Gunks climbing community.

Consider hiring a local guide, especially if you are new to the area or trad climbing. Guides can provide instruction, ensure safety, and enhance your overall climbing experience. They possess in-depth knowledge of the routes, conditions, and access regulations. Supporting local businesses and guides contributes to the sustainability of the Gunks climbing area.

Advanced Climbing in the Gunks

The Gunks offer challenging multi-pitch routes, aid climbing opportunities, and diverse bouldering areas for experienced climbers seeking to push their limits.

Multi-Pitch Climbing Routes

The Shawangunks are celebrated for their exceptional multi-pitch climbing, offering sustained routes that demand both physical endurance and technical skill. These climbs involve ascending a route in stages, or “pitches,” requiring climbers to establish anchors and belay partners up the wall.

Classic multi-pitch routes, like those found on the Trapps, provide a unique experience, often featuring moderate difficulties spread over considerable vertical distance. Proper rope management, efficient belaying techniques, and clear communication are paramount for safety and success.

Experienced climbers will find a wealth of options, ranging from single-day adventures to more committing ascents. Careful planning, including assessing weather conditions and carrying appropriate gear, is crucial before embarking on a multi-pitch climb in the Gunks.

Aid Climbing Opportunities

While the Gunks are primarily known for traditional face and crack climbing, opportunities for aid climbing exist, catering to climbers seeking a different challenge. Aid climbing involves using specialized gear – cams, hooks, and other devices – to create artificial holds and progress up the wall.

Certain routes feature sections where aid climbing is necessary or can be employed to overcome difficult obstacles. These sections often involve traversing blank or sparsely featured rock, demanding patience, precision, and a solid understanding of aid techniques.

Aid climbing in the Gunks requires a higher level of experience and specialized equipment. Climbers should be proficient in placing and assessing aid placements, as well as managing ropes and building secure anchors. It’s a niche discipline offering a unique perspective on the Gunks’ formidable cliffs.

Bouldering Areas in the Gunks

Though not as widely celebrated as its roped climbing, the Gunks offer a growing number of bouldering areas, providing accessible challenges for climbers of all levels. These areas typically feature smaller, independent rock formations and boulders scattered throughout the Shawangunk Ridge.

Popular bouldering spots include areas near the Trapps and Millbrook, offering a diverse range of problems – from beginner-friendly slabs to challenging overhangs. Bouldering in the Gunks emphasizes powerful movements, technical footwork, and dynamic body positioning.

Essential bouldering gear includes crash pads for fall protection, climbing shoes, and chalk. Spotting is crucial for safety, and climbers should be mindful of the environment and practice responsible bouldering ethics.

Training for Gunks Climbing

Success in the Gunks demands focused preparation; strength, endurance, and flexibility are vital. Targeted training builds the necessary physical and technical skills for challenging routes.

Strength Training for Climbing

Developing climbing-specific strength is crucial for tackling the Gunks’ demanding terrain. Focus on exercises that mimic climbing movements and build functional strength. Pull-ups are foundational, improving upper body pulling power essential for overhanging routes. Fingerboard training enhances grip strength, vital for the Gunks’ cracks and slabs, but should be approached cautiously to avoid injury.

Core work is paramount; a strong core stabilizes the body and improves efficient movement. Include exercises like planks, leg raises, and Russian twists. Antagonist muscle training – working muscles opposite those used in climbing – prevents imbalances and injuries. Push-ups, rows, and shoulder exercises are beneficial. Remember progressive overload; gradually increase the intensity and volume of your workouts to continually challenge your muscles and improve performance.

Endurance Training for Climbing

Conquering multi-pitch routes in the Gunks demands significant endurance. Interval training on a treadmill or stair stepper simulates the stop-and-go nature of climbing, improving cardiovascular fitness. Circuit training, combining strength exercises with minimal rest, builds muscular endurance. ARC (Aerobic Restoration and Capillarity) training – low-intensity, sustained activity – enhances blood flow to muscles, improving recovery and endurance.

Route-specific training is invaluable. Spend time climbing easier routes for extended periods, focusing on maintaining technique and minimizing fatigue. System board training allows for repetitive practice of movements, building endurance in a controlled environment. Prioritize proper nutrition and hydration to fuel your workouts and aid recovery. Consistent training is key to building the endurance needed for long days on the Gunks.

Flexibility & Mobility for Climbers

Climbing in the Gunks requires a full range of motion. Dynamic stretching before climbing prepares muscles for activity, while static stretching post-climbing improves flexibility. Focus on key areas: shoulders, hips, hamstrings, and ankles. Yoga and Pilates are excellent for building core strength and improving flexibility. Foam rolling helps release muscle tension and improve mobility.

Regular mobility work prevents injuries and enhances performance. Address muscle imbalances through targeted exercises. Prioritize consistent stretching as part of your training routine. Improved flexibility allows for greater reach, more efficient movement, and reduced risk of strains while navigating the Gunks’ challenging terrain.

real flame remote control instructions

Real Flame Remote Control Instructions: An Overview

This guide details operation of your Real Flame remote, covering pairing, functions, troubleshooting, and advanced settings for optimal fireplace control.

Understanding the nuances of “real” data types, like floats, is crucial for accurate signal transmission and a seamless user experience.

Understanding Your Remote

Your Real Flame remote is designed for intuitive control of your fireplace, utilizing sophisticated technology to mimic realistic flame and heat adjustments. It’s essential to grasp the distinction between ‘actual’ and ‘realistic’ settings, as the remote translates user input into signals adhering to IEEE 754 standards for precision.

The remote employs both float and real data types – approximate numerical representations – to manage control signals. These aren’t simply on/off commands; they represent a spectrum of values, influencing flame height, color, and heat output. Understanding this data precision, often utilizing 32-bit single precision, is key to interpreting the “real” experience you desire.

Consider the remote’s functionality as a bridge between your intention and the fireplace’s response, striving for a truly immersive and controllable ambiance.

Remote Control Components

The remote features clearly labeled buttons for power, mode selection, flame adjustment, and heat control, ensuring easy operation and a user-friendly experience.

Its design prioritizes accessibility, translating desired settings into precise data signals.

Button Functions: Power & Mode

The Power button initiates startup and shutdown of the fireplace, providing convenient control over operation. The Mode button cycles through available fireplace settings, such as flame-only, heat-with-flame, and potentially a timer or sleep mode. Understanding these modes is key to customizing your experience.

These functions rely on transmitting precise signals, often utilizing floating-point numbers (floats) to represent desired states. The remote adheres to IEEE 754 standards for signal accuracy, ensuring reliable communication with the fireplace unit. Distinguishing between “realistic” and “practical” settings allows for tailored comfort. The “real” experience is multifaceted, encompassing user interaction and perceived warmth.

Proper function depends on accurate data storage, potentially utilizing 32-bit single precision.

Button Functions: Flame Adjustment

Dedicated Flame Up and Flame Down buttons allow precise control over the visual intensity of the fireplace’s flame effect. These adjustments don’t alter actual heat output, focusing solely on aesthetic appeal. The remote transmits signals representing desired flame heights, often employing floating-point data (floats) for smooth transitions.

This process relies on the IEEE 754 standard to ensure accurate signal representation. The difference between “real” and “actual” flame appearance is crucial; the remote aims for a realistic simulation. Data precision, potentially using 32-bit single precision, impacts the granularity of adjustments. Achieving a truly “real” experience involves nuanced control and responsive feedback.

Understanding these controls enhances user satisfaction.

Button Functions: Heat Settings

Dedicated Heat Up and Heat Down buttons regulate the fireplace’s heating element output. Settings typically range from low to high, influencing the actual temperature produced. The remote transmits signals representing desired heat levels, utilizing numerical data – potentially floats or real numbers – for precise control.

Accuracy is paramount, adhering to IEEE 754 standards for reliable signal transmission. Distinguishing between “realistic” and “practical” heat settings is key; the remote offers options for both comfort and energy efficiency. Data storage, potentially 32-bit single precision, impacts responsiveness. The “real” experience hinges on consistent and predictable heating performance.

Proper heat control ensures user comfort.

Initial Setup & Pairing

Begin by installing batteries correctly. Pairing establishes communication between the remote and fireplace, ensuring responsive control via transmitted signals—real data types are key!

Battery Installation

Locate the battery compartment on the back of the remote control. Gently slide the compartment cover open, typically by pressing a release tab. Insert batteries, observing the correct polarity (+ and -) as indicated inside the compartment. Usually, this remote requires standard AAA or AA batteries – consult your fireplace’s documentation for specifics.

Ensure the batteries are fully inserted and making good contact. Replace the compartment cover, confirming it clicks securely into place. Incorrect battery installation can prevent the remote from functioning or cause intermittent operation. Using a mix of old and new batteries is not recommended, as this can affect performance. Always use high-quality batteries for optimal signal strength and longevity.

Pairing the Remote with the Fireplace

To pair the remote, ensure your fireplace is powered on. Locate the pairing button on your fireplace unit – it may be labeled “Pair,” “Connect,” or have a symbol resembling linked chains. Press and hold this button for approximately 5-10 seconds, until an indicator light begins to flash.

Within this timeframe, press and hold the power button on your remote control for a similar duration. The fireplace should emit a signal or display a message confirming successful pairing. If pairing fails, repeat the process, ensuring both the fireplace and remote are within close proximity. Understanding data transmission, like IEEE 754 standards, ensures accurate signal exchange.

Operating Instructions

Utilize the paired remote to power the fireplace, adjust flame height and color, and precisely control heat output for a customized ambiance.

Realize the potential of your fireplace with intuitive controls and responsive settings.

Powering On/Off the Fireplace

To activate your Real Flame fireplace, simply press the power button on the remote control. A confirmation signal will be sent, and the fireplace will initiate its startup sequence, displaying a realistic flame effect. Ensure the remote is properly paired before attempting to power on.

To turn off the fireplace, press the power button again. The flames will gradually diminish, and the unit will enter standby mode. A quick press will often suffice, but holding the button may offer a faster shutdown. Remember that consistent use of the remote ensures accurate control, mirroring the “real” experience of operating a traditional fireplace.

Verify the fireplace is completely off by checking for any residual glow or heat. Proper shutdown conserves energy and prolongs the lifespan of your unit.

Adjusting Flame Height & Color

Utilize the dedicated flame adjustment buttons on your Real Flame remote to customize the visual experience. Typically, upward and downward arrows control flame height, offering a spectrum from a gentle flicker to a robust blaze. Experiment to find your preferred ambiance.

Color adjustment options, if available, allow you to shift the flame’s hue, creating diverse moods. These adjustments rely on precise data transmission, utilizing “real” numbers (like floats) to represent color values. The IEEE 754 standard ensures accuracy in these signals.

Remember, the perceived “realness” is subjective. Adjust settings until the flame appearance aligns with your personal preference, creating a truly immersive and satisfying atmosphere.

Controlling Heat Output

Your Real Flame remote provides precise control over the fireplace’s heat output. Dedicated buttons, often marked with plus and minus symbols, or numerical levels, allow you to adjust the heating intensity. The remote transmits these settings as numerical data – often utilizing single-precision (32-bit) “real” numbers.

These values are interpreted by the fireplace’s control system, adjusting the heating element accordingly. Understanding the difference between “realistic” and “practical” settings is key; choose a level comfortable for your space. Accurate data representation, adhering to IEEE 754 standards, ensures consistent and reliable heating.

Monitor the displayed heat level to maintain your desired temperature.

Troubleshooting Common Issues

If issues arise, check batteries, re-pair the remote, and ensure a clear signal path. Data accuracy, using “real” numbers, impacts responsiveness.

Remote Not Responding

If your Real Flame remote isn’t responding, begin with the simplest solutions. First, verify that the batteries are fresh and correctly installed, ensuring proper polarity. Low battery power is a frequent cause of remote malfunction. Next, attempt to re-pair the remote with the fireplace unit, following the instructions in the ‘Pairing’ section of this manual.

Obstructions between the remote and the fireplace receiver can also interfere with the signal. Ensure a clear line of sight. Consider that the accuracy of control signals relies on “real” data types, and interference can corrupt these signals. If problems persist, try resetting the fireplace unit by briefly disconnecting its power source.

Fireplace Not Reacting to Remote

Should your Real Flame fireplace fail to respond to the remote, several factors could be at play. Confirm the remote is actively paired with the fireplace; re-pairing may be necessary. Inspect the fireplace’s receiver for any visible obstructions or damage. Ensure the fireplace is receiving power and isn’t in a standby or off mode that bypasses remote control.

Remember, accurate signal transmission relies on precise data – “real” numbers represented as floats. Interference can disrupt this. If the issue continues, a power cycle of the fireplace might resolve the problem. Consider the IEEE 754 standards governing data accuracy when troubleshooting.

Incorrect Heat Settings Displayed

If the heat settings displayed on your Real Flame fireplace differ from those selected on the remote, a data transmission issue may exist. This could stem from inaccuracies in the “real” numbers – floats – used to represent temperature values. Verify the remote’s batteries are fresh, as low power can corrupt signals.

Consider that single-precision (32-bit) data types, like ‘real’, have inherent limitations in precision. Recalibrate the remote following the pairing instructions. Ensure no external factors are interfering with the signal. If the problem persists, contact customer support for assistance, referencing potential IEEE 754 related discrepancies.

Advanced Features & Settings

Explore timer functionality, child lock options, and adjustable display brightness on your Real Flame remote for a customized and safe fireplace experience.

These settings leverage precise data control, ensuring accurate and reliable operation.

Timer Functionality

The Real Flame remote’s timer function allows for convenient, automated fireplace operation. You can program the fireplace to turn on or off at specific times, enhancing comfort and energy efficiency.

To set the timer, navigate to the timer icon on the remote display. Input your desired start and end times using the numeric keypad. The remote utilizes precise, “real” data – often employing IEEE 754 standards – to ensure accurate timing. This prevents discrepancies and guarantees the fireplace operates as scheduled.

Consider the difference between a “realistic” setting (a desired ambiance) and a “practical” one (energy savings). The timer bridges these, offering both. Remember, the remote handles data as single-precision (32-bit) values, impacting the granularity of timing adjustments.

Child Lock Feature

The Child Lock feature on your Real Flame remote prevents accidental operation by young children, ensuring safety and peace of mind.

To activate the child lock, press and hold the designated “Lock” button (refer to the ‘Remote Control Components’ section) for three seconds. A lock icon will appear on the remote’s display, indicating activation. All button presses will then be disabled, except for the power button in most models.

This feature relies on the remote’s internal processing of “real” data to recognize and respond to the lock command. Understanding the precision of these signals – often utilizing float and real data types – is key to reliable function. Deactivate by repeating the process; the lock icon will disappear.

Adjusting Remote Display Brightness

Customize your Real Flame remote’s display brightness for optimal visibility in various lighting conditions.

Access the brightness settings through the “Menu” button on the remote. Navigate using the directional buttons to find the “Display” or “Brightness” option. Select this option, and a slider or numerical scale will appear. Adjust the brightness level to your preference – higher for dark rooms, lower for bright environments.

The display utilizes “real” numbers to represent brightness levels, ensuring smooth transitions. The remote interprets these values, impacting the LCD’s output. Remember that accurate data representation, adhering to IEEE 754 standards, is vital for a clear and responsive display.

Remote Control Maintenance

Ensure longevity of your Real Flame remote with regular cleaning and proper battery replacement.

Maintaining the remote’s functionality relies on accurate data transmission, mirroring the “real” experience of fireplace control.

Cleaning the Remote

To maintain optimal performance of your Real Flame remote, regular cleaning is essential. Always power off the remote and remove the batteries before commencing any cleaning procedure. Use a soft, dry cloth to wipe down the exterior casing, removing dust and fingerprints.

Avoid using abrasive cleaners, solvents, or excessive moisture, as these can damage the remote’s sensitive electronic components. For stubborn grime, lightly dampen the cloth with water, ensuring it is thoroughly wrung out before use. Pay particular attention to the buttons, ensuring they are free from debris that could impede their functionality.

The precision of the remote’s signals, akin to “real” data transmission, relies on a clean and undamaged surface. Consistent cleaning contributes to a reliable and responsive control experience.

Battery Replacement Guidelines

Maintaining consistent power is vital for your Real Flame remote’s functionality. When the remote’s response becomes sluggish or erratic, it’s time for battery replacement. Use only batteries of the specified type – typically AAA or AA, as indicated in the battery compartment.

Always replace all batteries simultaneously to ensure balanced power distribution and prevent potential issues. Avoid mixing old and new batteries, or different battery brands. Ensure correct polarity when inserting the new batteries, matching the positive (+) and negative (-) terminals.

Like the accurate “real” data signals, consistent power ensures reliable operation. Dispose of used batteries responsibly, following local regulations for battery recycling.

Safety Precautions

Protect your remote from water damage and store it in a safe, dry location when not in use, ensuring longevity and reliable operation.

Avoiding Water Damage

Water and electronic devices are a dangerous combination. To prevent damage to your Real Flame remote control, always be mindful of its surroundings. Never use the remote in humid environments like bathrooms or near swimming pools.

Avoid placing drinks or other liquids near the remote, and immediately wipe up any spills with a soft, dry cloth. Do not attempt to disassemble the remote if it gets wet; this will void any warranty and could create a safety hazard.

Even seemingly minor moisture exposure can lead to corrosion and malfunction over time. Proper care and preventative measures are essential for maintaining the remote’s functionality and ensuring years of reliable service. Consider storing the remote in a protective case when not in use.

Proper Storage of the Remote

When not in use, store your Real Flame remote control in a cool, dry place, away from direct sunlight and extreme temperatures. Avoid leaving it exposed to dust or debris, which can interfere with button functionality.

A dedicated storage location, such as a drawer or on a remote control holder, will help prevent accidental damage or loss. Do not store the remote with other items that could scratch or press against the buttons.

Removing the batteries if the remote will be stored for an extended period is also recommended to prevent potential corrosion. Proper storage contributes significantly to the longevity and reliable performance of your remote control.

Understanding Real Flame Technology

Real Flame utilizes IEEE 754 standards for precise control signals, employing float and real data types to mimic authentic flame behavior effectively.

These approximations deliver a “real” experience through nuanced adjustments, mirroring realistic flame dynamics.

The Difference Between Float and Real Data Types (Related to Control Signals)

In the context of the Real Flame remote, both ‘float’ and ‘real’ data types are utilized as approximations for controlling flame characteristics. These aren’t absolute values, but rather numerical representations adhering to the IEEE 754 standard, ensuring consistent signal interpretation. ‘Real’ often refers to 32-bit single-precision numbers, requiring 32 bits of storage.

While often used interchangeably, understanding their underlying nature is vital; The remote leverages these data types to translate user input – like flame height or color adjustments – into signals the fireplace understands. This allows for a wide range of nuanced control, creating a more realistic and immersive experience; Precision is key, and careful data type selection impacts the fidelity of the simulated flame.

Essentially, they bridge the gap between your command and the fireplace’s response.

IEEE 754 Standards and Signal Accuracy

The Real Flame remote’s functionality relies heavily on the IEEE 754 standard for floating-point arithmetic. This standard defines how numbers are represented and processed, ensuring consistent and predictable behavior across different devices. Adherence to IEEE 754 is critical for accurate signal transmission, translating remote commands into precise fireplace adjustments.

Without this standardization, subtle variations in data interpretation could lead to inconsistent flame heights, inaccurate heat settings, or unresponsive controls. The standard minimizes rounding errors and ensures that the fireplace receives reliable instructions. This contributes to the overall realism and responsiveness of the system, delivering a user experience that feels intuitive and dependable.

It’s the foundation of precise control.

Real vs; Actual: Clarifying Terminology in Control Systems

Distinguishing “realistic” from “practical” settings is key; the remote aims for a truly responsive experience, mirroring actual flame behavior with precision.

Realistic vs. Practical Settings

The Real Flame remote balances realistic flame simulation with practical usability. While aiming for a truly “real” fire appearance – mirroring nuanced fluctuations – the system must also offer settings suitable for everyday use.

“Realistic” settings prioritize visual fidelity, potentially utilizing the full range of float and real data types (IEEE 754 compliant) to represent subtle flame variations. However, excessively complex simulations might strain processing or feel unpredictable.

“Practical” settings focus on user control and consistent performance. These settings might simplify flame behavior, offering easily adjustable height and color options. The goal is a satisfying experience, even if it doesn’t perfectly replicate every aspect of a natural fire.

Ultimately, the remote allows users to tailor the experience, choosing between a highly detailed, realistic simulation or a more streamlined, practical control scheme.

Data Precision and Remote Control

Remote signals rely on data precision; 32-bit single precision (Real) impacts accuracy. IEEE 754 standards ensure reliable communication between remote and fireplace.

32-bit Single Precision and Data Storage

The Real Flame remote utilizes 32-bit single precision for transmitting control signals. This means each data point, representing flame height, heat level, or timer settings, is stored using 32 bits of computer memory. Compared to higher precision formats, 32-bit offers a balance between data size and accuracy.

This precision level, adhering to IEEE 754 standards, dictates the granularity of control achievable. While sufficient for most adjustments, it’s important to recognize that it’s an approximation of a continuous range. The remote’s internal processing and the fireplace’s receiver both interpret these 32-bit values to adjust the flame and heat accordingly. Understanding this data storage method is key to appreciating the remote’s capabilities and limitations.

Choosing the right data type ensures efficient communication.

Interpreting the “Real” Experience

The “real” experience with your fireplace is multifaceted, blending user interaction with the remote’s control signals and the fireplace’s response to create ambiance.

The Multifaceted Nature of “Real” in User Interaction

The perception of a “real” flame experience, controlled remotely, isn’t solely about visual fidelity. It’s a complex interplay between the user’s expectations, the responsiveness of the remote, and the fireplace’s ability to mimic natural flame behavior.

Consider the data transmission – utilizing float and real data types adhering to IEEE 754 standards ensures signal accuracy. However, even with precise data, the interpretation is subjective. A “realistic” setting might differ from a “practical” one, depending on individual preferences. The remote’s interface and the speed of response contribute significantly to the feeling of control and authenticity;

Ultimately, the “real” experience is a constructed reality, skillfully engineered through technology to evoke a sense of warmth and comfort. It’s about how the system feels as much as how it functions.

therapy consent form pdf

Article Plan: Therapy Consent Form PDF

This article details essential aspects of therapy consent forms‚ covering legal requirements‚ ethical considerations‚ and practical guidance for both therapists and clients.

Therapy consent forms are a cornerstone of ethical and legal practice in the mental health field. These documents aren’t merely bureaucratic hurdles; they represent a collaborative agreement between therapist and client‚ establishing a foundation of trust and transparency. The University of Houston’s Counseling and Psychological Services emphasizes quality control and training through potential session recordings‚ requiring opt-out forms for those who decline.

Understanding the purpose and components of these forms is crucial for both parties. They outline the nature of therapy‚ confidentiality parameters‚ financial responsibilities‚ and client rights. As treatment guidelines evolve – particularly in trauma care with therapies like CPT‚ PET‚ and TF-CBT – consent forms must reflect these advancements‚ ensuring informed decision-making.

What is a Therapy Consent Form?

A therapy consent form is a legally binding document outlining the terms of the therapeutic relationship. It details the services provided – encompassing psychotherapy‚ which utilizes communication to address emotional and behavioral patterns – and clarifies the client’s rights and responsibilities. Forms‚ like those available on pdfFiller‚ often address adolescent consent and privacy policies.

Crucially‚ it confirms the client’s voluntary participation and understanding of the process. This includes awareness of potential risks and benefits‚ confidentiality limits‚ and financial obligations. The University of Houston’s example highlights potential session recording for training purposes‚ contingent upon explicit consent or an opt-out request.

The Importance of Informed Consent in Therapy

Informed consent is paramount in ethical and legal therapeutic practice. It respects client autonomy‚ ensuring individuals enter therapy with a full understanding of what to expect. This process‚ documented via a consent form‚ fosters trust and collaboration between therapist and client.

As highlighted by resources like those from the University of Houston‚ consent extends to aspects like session recording for quality control and training. Without informed consent‚ therapy can be considered unethical‚ potentially leading to legal repercussions. It’s not merely a formality; it’s a demonstration of respect for the client’s rights and a cornerstone of responsible mental healthcare.

Key Elements of a Standard Therapy Consent Form

A comprehensive therapy consent form typically includes several crucial sections. These forms‚ as exemplified by templates from pdfFiller‚ begin with detailed client information and demographics‚ alongside the therapist’s credentials and contact details.

Crucially‚ the form outlines the nature of therapy‚ including treatment goals and the therapeutic approach. It must also clearly address confidentiality‚ its limits (like mandatory reporting)‚ and financial aspects – fees‚ payment methods‚ and insurance details. Policies regarding cancellations and no-shows are also standard inclusions‚ ensuring clarity for both parties involved in the therapeutic process.

Client Information and Demographics

This section of the consent form gathers essential details for identification and contact purposes. Typically‚ it requests the client’s full name‚ date of birth‚ address‚ phone number‚ and emergency contact information.

Demographic data‚ such as gender identity‚ ethnicity‚ and language preference‚ may also be included to help therapists provide culturally sensitive care. Forms‚ like those referenced on pdfFiller‚ emphasize the importance of accurate information for record-keeping and potential communication regarding treatment. This data ensures proper client identification and facilitates effective therapeutic engagement from the outset.

Therapist Information and Credentials

This crucial section establishes the therapist’s professional identity and qualifications. It includes the therapist’s full name‚ professional title (e.g.‚ Licensed Clinical Social Worker‚ Psychologist)‚ license number‚ and contact information – including office address and phone number.

Details regarding the therapist’s education‚ training‚ and areas of specialization are also typically provided; The University of Houston’s Counseling and Psychological Services example highlights the importance of transparency. This information assures clients they are working with a qualified professional and fosters trust within the therapeutic relationship‚ demonstrating accountability and ethical practice.

Nature of Therapy and Treatment Goals

This section clearly outlines the type of therapy offered‚ such as individual‚ group‚ or telehealth‚ and the therapeutic approach employed (e.g.‚ Cognitive Behavioral Therapy). It details what clients can generally expect during sessions‚ including the typical duration and frequency.

Crucially‚ it collaboratively establishes preliminary treatment goals. While goals evolve‚ this initial discussion sets expectations. Considering emerging PTSD treatments like Cognitive Processing Therapy and Prolonged Exposure Therapy‚ the form should indicate if specialized modalities are utilized. A clear understanding of the therapy’s nature and aims empowers clients and supports informed participation.

Confidentiality and its Limits

A cornerstone of ethical therapy is maintaining client confidentiality. The consent form must explicitly state this commitment‚ assuring clients their information won’t be disclosed without written consent. However‚ absolute confidentiality isn’t possible.

The form must detail legally mandated exceptions‚ such as suspected child abuse or threats of harm to self or others – mandatory reporting requirements. It should also address HIPAA compliance and patient privacy rights. University counseling services‚ like those at the University of Houston‚ may involve session observation for training purposes‚ requiring a separate opt-out form.

HIPAA Compliance and Patient Privacy

The Health Insurance Portability and Accountability Act (HIPAA) establishes national standards to protect sensitive patient health information. A therapy consent form must acknowledge HIPAA regulations‚ outlining client rights regarding access to their records‚ amendment procedures‚ and accounting of disclosures.

The form should clearly explain how the therapist safeguards patient data – both physical and electronic records. It needs to detail the therapist’s responsibilities in maintaining privacy and the consequences of breaches. Clients must understand their rights to receive a Notice of Privacy Practices‚ detailing how their protected health information is used and disclosed.

Exceptions to Confidentiality (Mandatory Reporting)

While therapy prioritizes confidentiality‚ legal and ethical obligations necessitate certain exceptions. A comprehensive therapy consent form must explicitly outline these mandatory reporting requirements. These typically include situations involving suspected child abuse or neglect‚ elder abuse‚ and threats of serious harm to self or others.

The form should clearly state that the therapist is legally obligated to report such instances to the appropriate authorities‚ even without the client’s consent. It’s crucial to detail the specific circumstances triggering these reports and the process involved‚ ensuring clients are fully aware of these limitations to confidentiality.

Fees‚ Payment‚ and Insurance

A clear and detailed section on fees is paramount within a therapy consent form. This includes the per-session cost‚ accepted payment methods (cash‚ check‚ credit card)‚ and any potential charges for late payments or returned checks. The form should also address insurance coverage‚ specifying whether the therapist is in-network or out-of-network with various providers.

If clients intend to seek reimbursement from their insurance company‚ the form should outline the necessary documentation (e.g.‚ superbills) the therapist will provide. Transparency regarding financial responsibilities minimizes misunderstandings and fosters a trusting therapeutic relationship.

Cancellation and No-Show Policies

Therapy consent forms must explicitly state the clinic’s cancellation and no-show policies. Typically‚ a specified notice period (e.g.‚ 24-48 hours) is required for cancellations to avoid a fee. The form should clearly define the financial consequences of missed appointments‚ often a full session charge.

These policies protect the therapist’s time and income while also encouraging client commitment to the therapeutic process. Exceptions to the policy‚ such as emergencies‚ should be briefly addressed. A well-defined policy minimizes disputes and ensures fair treatment for both parties involved in the therapeutic relationship.

Risks and Benefits of Therapy

A comprehensive therapy consent form acknowledges both potential benefits and inherent risks of psychotherapy. Potential benefits include improved emotional well-being‚ healthier coping mechanisms‚ and enhanced self-awareness. However‚ therapy can also evoke uncomfortable emotions‚ memories‚ or temporary distress as clients confront challenging issues.

The form should state that there are no guarantees of specific outcomes. It’s crucial to outline potential risks like emotional discomfort‚ or the possibility of recalling painful experiences. Transparency about these factors empowers clients to make informed decisions about their participation and manage expectations realistically.

Potential Benefits of Psychotherapy

A well-drafted therapy consent form clearly articulates the potential positive outcomes of engaging in psychotherapy. These benefits can encompass a wide spectrum‚ including reduced symptoms of anxiety and depression‚ improved interpersonal relationships‚ and increased self-esteem. Clients may experience enhanced coping skills to navigate life’s challenges more effectively.

The form should highlight the possibility of gaining greater self-understanding‚ resolving past traumas‚ and developing healthier emotional regulation strategies. It’s important to emphasize that individual results vary‚ and therapy is a collaborative process requiring active participation from the client.

Potential Risks and Discomforts

A comprehensive therapy consent form must also address potential risks and discomforts associated with the therapeutic process. While generally safe‚ psychotherapy can evoke difficult emotions‚ memories‚ and psychological distress. Clients may temporarily experience increased anxiety‚ sadness‚ or feelings of vulnerability as they confront challenging issues.

The form should acknowledge the possibility of recalling painful experiences‚ and the potential for relationship dynamics within therapy to mirror past problematic patterns. It’s crucial to state that there are no guarantees of specific outcomes‚ and progress isn’t always linear.

Specific Therapy Modalities and Consent

Certain therapy approaches necessitate specialized consent procedures due to their unique nature and potential intensity. For instance‚ Cognitive Processing Therapy (CPT) requires explicit consent acknowledging the challenging work of confronting traumatic memories. Prolonged Exposure Therapy (PET) demands informed consent regarding deliberate exposure to trauma-related stimuli.

Similarly‚ Trauma-Focused Cognitive Behavioral Therapy (TF-CBT) needs specific consent‚ particularly when working with minors and their families. The consent form should detail the specific techniques used‚ potential discomforts‚ and the rationale behind the chosen modality‚ ensuring the client understands the process.

Cognitive Processing Therapy (CPT) Consent

CPT consent forms must clearly outline the therapy’s focus on challenging and modifying unhelpful thoughts related to traumatic events. Clients need to understand CPT involves detailed recounting of the trauma‚ potentially causing significant emotional distress. The form should explicitly state the therapist’s role in guiding this process and providing coping strategies.

It’s crucial to detail the homework assignments‚ which require clients to actively engage with their trauma narratives outside of sessions. The consent should also address potential risks like increased anxiety or temporary worsening of symptoms‚ alongside the anticipated benefits of reduced PTSD symptoms and improved coping skills.

Prolonged Exposure Therapy (PET) Consent

PET consent forms require a thorough explanation of the therapy’s core component: repeated‚ gradual exposure to trauma-related memories‚ feelings‚ and situations. Clients must understand this isn’t about reliving the trauma‚ but about processing it safely to reduce anxiety and avoidance behaviors. The form should emphasize the collaborative nature of exposure exercises.

Potential discomfort and anxiety are key elements to address‚ alongside the therapist’s role in providing support and coping mechanisms during exposure. It’s vital to clarify that clients have control over the pace of exposure and can stop at any time. Benefits‚ such as reduced PTSD symptoms and improved daily functioning‚ should also be clearly stated.

Trauma-Focused Cognitive Behavioral Therapy (TF-CBT) Consent

TF-CBT consent forms must detail this integrated approach‚ combining trauma-sensitive principles with cognitive behavioral techniques. Clients need to understand the components: Psychoeducation‚ relaxation skills‚ cognitive processing of traumatic events‚ and in-vivo exposure (if appropriate). The form should highlight the involvement of caregivers‚ particularly for child clients‚ and their role in supporting the therapeutic process.

The consent should address potential emotional distress during processing‚ emphasizing the therapist’s support and coping strategies. It’s crucial to explain how TF-CBT aims to reduce trauma-related symptoms‚ improve coping skills‚ and restore a sense of safety and control. Benefits like improved emotional regulation and reduced behavioral problems should be outlined.

Group Therapy Consent Considerations

Group therapy consent forms require specific additions beyond individual therapy agreements. Clients must be informed that confidentiality cannot be absolutely guaranteed due to the presence of other participants. The form should emphasize the importance of respecting the privacy of fellow group members and refraining from discussing their disclosures outside the group setting.

It’s vital to explain the group’s focus and therapeutic approach‚ outlining potential benefits like increased social support and opportunities for interpersonal learning. The consent should also address potential challenges‚ such as confronting difficult emotions or navigating group dynamics. Clients need to understand the therapist’s role in facilitating a safe and productive group environment.

Session Recording and Observation

Therapy consent forms must explicitly address the possibility of session recording and observation. Clients need clear‚ informed consent before any recording takes place‚ detailing the purpose – often for quality control‚ training‚ or supervision – and how the recordings will be stored and protected.

The form should state who will have access to the recordings and for how long they will be retained. Importantly‚ clients should have the right to refuse recording‚ with an “opt-out” option clearly outlined.

Observation by trainees or supervisors should also be disclosed‚ specifying whether it will be in person or remotely.

Minors and Consent – Parental/Guardian Involvement

When treating minors‚ therapy consent forms require specific attention to parental or guardian involvement. Generally‚ legal consent for therapy must be obtained from a parent or legal guardian‚ especially for children under 18.

The form should clearly identify who has the legal authority to consent and outline the extent of their involvement in the therapy process.

Exceptions may exist for emancipated minors or in situations involving mature minors with specific legal allowances‚ requiring careful documentation and legal consultation.

The consent form must address confidentiality limitations regarding communication with parents/guardians.

Digital Therapy and Telehealth Consent

With the rise of telehealth‚ therapy consent forms must explicitly address the unique considerations of digital therapy. This includes outlining the technologies used for sessions – video conferencing‚ phone calls‚ or messaging – and associated risks.

The form should detail measures taken to ensure data security and confidentiality during transmission and storage of electronic health information‚ adhering to HIPAA guidelines.

Clients need to acknowledge potential technical difficulties that may disrupt sessions and the plan for addressing them.

Emergency procedures‚ including contact information and location verification‚ are crucial components of telehealth consent.

Obtaining and Reviewing the PDF Form

Therapists should provide the therapy consent form in a readily accessible PDF format‚ allowing clients ample time to review it before the initial session.

Offering the form electronically‚ via a secure portal or email‚ streamlines the process‚ but ensure compliance with privacy regulations.

Clients should be encouraged to ask questions and seek clarification on any aspect of the form they don’t understand.

A signed copy of the consent form‚ whether digital or physical‚ must be retained in the client’s record as proof of informed consent.

Client Rights and Responsibilities

Clients possess the fundamental right to informed consent‚ encompassing understanding the nature of therapy‚ potential risks and benefits‚ and confidentiality limits.

They have the right to refuse or withdraw consent at any time‚ without penalty‚ although this may impact the therapeutic process.

Responsibilities include honest self-disclosure‚ active participation in therapy‚ and adherence to agreed-upon policies like cancellation fees.

Clients should promptly address any concerns regarding their treatment or the therapist’s conduct‚ fostering a collaborative and ethical therapeutic relationship.

Therapist Responsibilities Regarding Consent

Therapists bear the crucial responsibility of ensuring clients fully comprehend the consent form’s contents‚ utilizing clear and accessible language.

They must proactively address any client questions or concerns‚ verifying understanding before proceeding with therapy.

Ongoing consent is vital; therapists should revisit and update the form as treatment evolves or new modalities are introduced.

Maintaining meticulous documentation of the consent process‚ including signed forms and any discussions‚ is paramount for legal and ethical protection.

Respecting a client’s decision to refuse or withdraw consent is non-negotiable.

Legal Considerations and State Laws

Therapy consent forms are subject to varying state laws and regulations‚ demanding therapists stay informed about specific requirements in their jurisdiction.

HIPAA regulations significantly impact confidentiality clauses‚ necessitating clear explanations of patient privacy rights.

Mandatory reporting laws regarding child abuse‚ elder abuse‚ or threats of harm must be explicitly outlined‚ even if they limit confidentiality.

Forms must adhere to legal standards for contracts‚ including clear language‚ signatures‚ and dates.

Consulting with legal counsel specializing in healthcare law is advisable to ensure compliance and mitigate potential risks.

Where to Find Sample Therapy Consent Form PDFs

Numerous online resources offer sample therapy consent form PDFs‚ but careful evaluation is crucial to ensure suitability and legal compliance.

The University of Houston’s Counseling and Psychological Services provides a detailed informed consent document as an example.

pdfFiller hosts a collection of 18 printable informed consent forms for counseling‚ offering diverse templates.

Professional organizations like the American Psychological Association (APA) or the American Counseling Association (ACA) may offer resources or guidance.

State licensing boards sometimes provide sample forms or recommended language.

Updating and Revising Consent Forms

Regularly updating therapy consent forms is vital to reflect changes in laws‚ ethical guidelines‚ and practice modalities‚ like the increasing use of telehealth.

Review forms annually‚ or whenever significant changes occur in your practice‚ such as adopting new therapeutic techniques (CPT‚ PET‚ TF-CBT).

Consider updates related to digital therapy‚ session recording policies‚ and evolving interpretations of confidentiality‚ especially regarding HIPAA compliance.

Document all revisions and the rationale behind them.

Seek legal counsel to ensure the updated form meets all applicable state and federal requirements‚ maintaining ethical and legal practice.

A well-crafted therapy consent form is paramount for establishing a strong therapeutic alliance built on trust and transparency.

Prioritizing informed consent safeguards client rights‚ minimizes legal risks‚ and demonstrates professional responsibility.

Regularly reviewing and updating forms—considering evolving laws and therapeutic approaches—is crucial.

Clear communication regarding confidentiality‚ fees‚ and cancellation policies is essential.

Ultimately‚ a comprehensive consent process reflects a commitment to ethical and legal standards‚ fostering a safe and effective therapeutic environment for all involved.

micro nc dab kit instructions pdf

Micro NC Dab Kit Instructions: A Comprehensive Guide

This guide details using the Micro NC Dab Kit, a portable nectar collector for oils & concentrates. Find setup, dabbing techniques, cleaning, and troubleshooting information.

Understanding the Micro NC Dab Kit

The Micro NC Dab Kit represents a streamlined approach to enjoying concentrates, offering portability and ease of use compared to traditional dab rigs. Essentially, it’s a modern take on the nectar collector, often referred to as a honey straw or dab straw. This kit is designed specifically for oils and concentrates, providing a direct pathway for vaporizing your chosen extract.

Unlike conventional dabbing which involves a separate heating element (banger or nail) and a water filtration system, the Micro NC integrates these functions into a compact, often all-in-one unit. Many versions feature an electric heating element for precise temperature control, eliminating the need for a torch. The kit’s simplicity makes it ideal for both beginners and experienced users seeking a discreet and convenient dabbing experience. It’s a cheap dab rig, offering a portable version of the nectar collector.

Understanding its components and operation is key to maximizing enjoyment and ensuring safe usage.

Components of the Kit

A typical Micro NC Dab Kit comprises several key components working in harmony. The core element is the titanium tip, responsible for heating and vaporizing the concentrate. This tip often connects to an electric heating element, allowing for adjustable temperature settings. Many kits include a glass or silicone body, acting as the mouthpiece and providing a pathway for vapor inhalation.

Some kits feature a water filtration chamber, enhancing the smoothness of the vapor by cooling and filtering it. A charging port is essential for electric models, usually utilizing a USB connection. Depending on the specific kit, you might also find additional accessories like dab tools for handling concentrates, carrying cases for portability, and replacement tips or coils.

Each part is designed to fit perfectly together, ensuring a seamless and efficient dabbing experience. Familiarizing yourself with each component’s function is crucial for proper assembly, operation, and maintenance.

What is a Nectar Collector?

A nectar collector, often called a honey straw or dab straw, represents a unique method of consuming concentrates. Unlike traditional dab rigs requiring a separate heating source and nail, a nectar collector combines both into a single, portable unit. It functions by directly touching a heated tip – typically titanium – to a concentrate source, vaporizing it upon contact.

This method allows for on-demand vaporization, offering a more efficient and flavorful experience. Nectar collectors are favored for their simplicity, portability, and ease of use. The Micro NC Dab Kit builds upon this concept, often incorporating an electric heating element for precise temperature control and enhanced convenience.

Essentially, it’s a streamlined alternative to traditional dabbing, appealing to users seeking a discreet and efficient way to enjoy their concentrates. It’s a simple yet elegant water pipe.

Types of Concentrates for Use

The Micro NC Dab Kit is designed for use with a variety of oils and concentrates, each offering a distinct flavor profile and potency. Common options include wax, shatter, budder, and crumble – all derived from cannabis or other botanical sources. The consistency of the concentrate can influence the dabbing experience; softer consistencies like budder may require less heat.

Resin and live resin are also popular choices, known for their rich terpene content and enhanced flavor. When using the Micro NC, it’s crucial to start with a small amount of concentrate to gauge its potency and avoid overconsumption.

Experimentation is key to finding your preferred concentrate and dosage. Remember to source concentrates from reputable vendors to ensure quality and purity. The kit is specifically designed for these extracts.

Preparing the Micro NC Dab Kit for Use

Before your first session with the Micro NC Dab Kit, ensure all components are present and undamaged. Familiarize yourself with each part – the titanium tip, glass body, and any included accessories. A quick visual inspection will confirm everything is in working order.

It’s recommended to have a small amount of your chosen concentrate readily available. Prepare a clean, stable surface to work on, minimizing the risk of spills or accidents. Ensure the area is well-ventilated.

Understanding the kit’s assembly and heating process beforehand will streamline the experience. The Micro NC is designed for portability, so consider where you’ll be using it. Proper preparation enhances safety and enjoyment.

Assembling the Kit

The Micro NC Dab Kit’s assembly is straightforward, designed for quick and easy setup. Begin by carefully attaching the titanium tip to the designated end of the glass body. Ensure a secure connection, but avoid excessive force to prevent breakage.

If your kit includes additional components like a mouthpiece or water filtration attachment, connect these now, following the kit’s specific diagram. A snug fit is crucial for optimal vapor flow and a comfortable experience.

Double-check all connections before proceeding. A properly assembled kit minimizes air leaks and maximizes vapor production. The compact design allows for discreet use, making it ideal for on-the-go enjoyment. Remember, each part fits perfectly together.

Heating the Titanium Tip

Heating the titanium tip is a critical step for effective dabbing with the Micro NC Dab Kit. Begin with a low-temperature setting, gradually increasing the heat as needed. Avoid overheating, as this can scorch the concentrate and produce harsh vapor.

Apply heat evenly across the tip’s surface, ensuring it reaches a consistent temperature. Observe the tip closely; it should glow slightly, indicating it’s ready for use. Be cautious, as the titanium will become very hot.

A little heat goes a long way – start small and adjust. You want to melt the concentrate without burning it. Proper heating ensures a flavorful and smooth dabbing experience. Remember to be careful and prioritize safety during this process.

Loading the Concentrate

Loading the concentrate onto the titanium tip requires precision to avoid waste and ensure optimal vaporization. Use a dab tool to carefully scoop a small amount of your chosen concentrate – wax, shatter, or oil. Start with a rice-grain-sized portion; you can always add more if needed.

Gently apply the concentrate directly to the heated titanium tip. Avoid overloading, as this can lead to inefficient vaporization and a messy experience. The heat from the tip will begin to melt the concentrate almost immediately.

Touch the tip to the concentrate, allowing it to adhere. Be mindful of the melting process; you’re aiming for a smooth, even coating. Proper loading is key to maximizing flavor and vapor production with your Micro NC Dab Kit.

Dabbing Technique: Step-by-Step

Begin by ensuring your Micro NC Dab Kit is assembled and the titanium tip is adequately heated. Gently touch the heated tip to your pre-loaded concentrate, allowing it to melt and vaporize. Inhale slowly and steadily through the mouthpiece as you make contact.

Maintain consistent contact between the tip and the concentrate while inhaling. Avoid pressing too hard, as this can cause splashing. Rotate the tip slightly to ensure even vaporization of the entire concentrate portion.

Control the intensity of your dab by adjusting the duration of contact and the amount of concentrate used. Experiment to find your preferred level of vapor production and flavor. Remember to exhale slowly and enjoy the experience!

Inhalation and Vapor Production

Upon contact between the heated titanium tip and your concentrate, vapor will immediately begin to form. Initiate a slow, deliberate inhale through the mouthpiece simultaneously. The speed of your inhalation directly impacts vapor density; slower draws yield thicker clouds.

Observe the vapor’s color and consistency – it should be translucent and smooth. Dark or harsh vapor indicates overheating or impurities in your concentrate. Adjust the tip’s temperature or source your concentrates from a reputable vendor.

Experiment with different inhalation techniques to discover your preference. Short, quick puffs provide a concentrated burst, while longer, sustained draws offer a more gradual experience. Remember to exhale slowly, savoring the flavor and effects.

Cleaning and Maintenance

Regular cleaning is crucial for optimal performance and longevity of your Micro NC Dab Kit. Residue buildup affects flavor and vapor quality, and can hinder functionality. Clean after each use for best results.

Begin by allowing the kit to cool completely. Disassemble all components – titanium tip, glass body, and any attachments. Use isopropyl alcohol (91% or higher) and cotton swabs to thoroughly clean each part, focusing on the tip and mouthpiece. For stubborn residue, a brief soak in alcohol may be necessary.

Rinse all components with warm water and ensure no alcohol remains. Allow to air dry completely before reassembling. Avoid abrasive cleaners, as they can damage the glass. Consistent cleaning prevents buildup and ensures a smooth dabbing experience.

Disassembling the Kit for Cleaning

Before cleaning your Micro NC Dab Kit, complete disassembly is essential for a thorough process. Begin by gently twisting the titanium tip counterclockwise to detach it from the glass body. Be cautious, as the tip may still retain some heat.

Next, carefully separate any water filtration components, if applicable, by gently pulling or unscrewing them. Inspect each part for any remaining concentrate residue. If the kit includes multiple sections, like a mouthpiece or additional glass connections, detach those as well.

Ensure all parts are separated and laid out for easy access during the cleaning phase. Proper disassembly allows for targeted cleaning of each component, maximizing effectiveness and preventing residue buildup in hard-to-reach areas.

Cleaning Solutions and Methods

For effective cleaning of your Micro NC Dab Kit, isopropyl alcohol (91% or higher) is the recommended primary solution. Combine it with coarse salt – the salt acts as a gentle abrasive to scrub away stubborn residue. Alternatively, specialized glass cleaning solutions designed for dab rigs are available.

To clean, soak disassembled parts in isopropyl alcohol for at least 30 minutes, or longer for heavily soiled components. Then, gently shake the parts with the salt, focusing on areas with buildup. Rinse thoroughly with warm water, ensuring all traces of alcohol are removed.

For the titanium tip, avoid harsh abrasives that could damage the surface. A Q-tip dipped in isopropyl alcohol is ideal for cleaning the tip’s interior. Regular cleaning prevents flavor contamination and ensures optimal performance.

Troubleshooting Common Issues

If your Micro NC Dab Kit isn’t heating properly, first ensure it’s fully charged. Check the connection between the battery and the heating element. A weak connection can cause inconsistent heating. If the tip isn’t getting hot enough, try adjusting the voltage settings, starting with a lower setting and gradually increasing.

If you experience a clogged airflow, disassemble the kit and thoroughly clean all components, paying close attention to the tip and any air passages. Residue buildup is a common cause. If vapor production is minimal, ensure you’re applying enough heat and using a sufficient amount of concentrate.

For battery issues, consult the manufacturer’s instructions regarding charging and storage. Avoid overcharging or exposing the battery to extreme temperatures. If problems persist, contact customer support.

Safety Precautions

Always exercise caution when using the Micro NC Dab Kit due to the high temperatures involved. The titanium tip gets extremely hot and can cause severe burns – avoid direct contact. Ensure adequate ventilation in your dabbing area, as vapor can be potent. Start with small dabs to gauge your tolerance and avoid overconsumption.

Keep the kit out of reach of children and pets. Never leave a heated device unattended. Store concentrates in a secure location, away from potential access. Be mindful of your surroundings and avoid using the kit in public places where it may be prohibited.

Proper cleaning is crucial for safety; residue buildup can affect vapor quality and potentially create harmful byproducts. Handle the glass components with care to prevent breakage and injury.

Where to Find PDF Instructions

Locating a dedicated PDF instruction manual for the Micro NC Dab Kit can be challenging, as many retailers don’t directly provide one. However, several online resources offer guidance. Checking the website of the vendor from whom you purchased the kit is a good starting point; some may host downloadable manuals.

YouTube tutorials, like those demonstrating how to use a nectar collector or Micro NC, often visually explain the setup and operation. TikTok also features numerous short videos showcasing the kit’s use. Searching online forums dedicated to concentrates and dabbing can yield user-shared instructions or links to relevant resources.

If a PDF isn’t available, compiling information from these video and forum sources can create a comprehensive guide. Remember to prioritize safety information from reputable sources.

Alternative Dab Kit Options

Beyond the Micro NC Dab Kit, a range of alternatives cater to different preferences and budgets. Traditional dab rigs, utilizing a nail and dome, offer a classic dabbing experience, though they are less portable. Electric dab rigs provide precise temperature control and convenience, often at a higher price point.

Other nectar collector styles, including glass and quartz options, vary in heat retention and flavor purity. Dab straws, similar in concept to the Micro NC, come in various materials and designs. For those seeking portability, electric dab pens offer a discreet and convenient option.

When choosing an alternative, consider factors like ease of use, cleaning requirements, and desired level of control over the dabbing process. Researching reviews and comparing features will help you find the best fit.

Micro NC Dab Kit vs. Traditional Dab Rigs

The Micro NC Dab Kit distinguishes itself from traditional dab rigs primarily through portability and simplicity. Traditional rigs involve a separate nail, dome, and torch for heating, requiring more setup and skill. The Micro NC, often electric, offers on-demand heating and a more streamlined experience.

Traditional rigs generally provide greater control over temperature and airflow, appealing to experienced users. However, they are less convenient for on-the-go use. The Micro NC’s compact size makes it ideal for discreet dabbing. Cleaning can be simpler with the Micro NC, as fewer components are involved.

Cost-wise, Micro NC kits are often more affordable than complete traditional dab rig setups. Ultimately, the best choice depends on individual preferences regarding portability, control, and budget.

Resources and Further Information

For visual learners, TikTok offers numerous videos demonstrating Micro NC Dab Kit usage; search “How to Use Micro Nc Dab Kit” for practical demonstrations and user tips. These videos often showcase assembly, heating techniques, and cleaning procedures.

Online retailers selling Micro NC kits frequently provide basic usage guides or links to manufacturer resources. Exploring these websites can yield additional insights into specific kit models. Remember to prioritize safety and responsible use when consulting online information.

While a dedicated, comprehensive PDF instruction manual may not always be readily available, combining information from various sources – including vendor websites, video tutorials, and community forums – can provide a thorough understanding of the Micro NC Dab Kit and its optimal operation.

carnival legend itinerary 2024 pdf

Carnival Legend Itinerary 2024: A Comprehensive Guide

Accessing Carnival Legend itinerary PDFs is easily done through the official Carnival website‚ travel agents‚ or various third-party cruise booking platforms.

Understanding the 2024 Itineraries

Carnival Cruise Line currently publishes its itineraries until mid-2027‚ constantly reviewing and updating destinations beyond that timeframe. For the Carnival Legend in 2024‚ a diverse range of cruise options are available‚ encompassing destinations like Alaska‚ the Mexican Riviera‚ Hawaii‚ and the Panama Canal‚ alongside exciting Transpacific voyages;

Detailed schedules‚ port timings‚ and onboard activities are readily accessible via downloadable itinerary PDFs. These PDFs provide a comprehensive overview for planning your cruise experience. Remember that itineraries are always subject to change‚ so checking for the latest updates before your departure is crucial. Accessing these documents ensures a well-prepared and enjoyable voyage.

Availability of Itinerary PDFs

Carnival Legend’s 2024 itineraries in PDF format are conveniently accessible through multiple channels. The official Carnival website serves as the primary source‚ offering downloadable PDFs for each cruise. Alternatively‚ your travel agent can readily provide these documents as part of your booking package.

Furthermore‚ numerous third-party cruise booking sites also host these PDFs for easy access. These documents detail daily schedules‚ port information‚ and onboard activities. Ensuring you have the latest PDF version is vital‚ as itineraries can be subject to updates. Download and review your itinerary PDF to maximize your cruise planning!

Online Check-In Procedures

Carnival prioritizes a seamless embarkation process‚ emphasizing the importance of Online Check-In. Guests are required to complete this process and select an Arrival Appointment no later than midnight (Eastern Time) before sailing. This is crucial for U.S; Department of Homeland Security (DHS) requirements‚ which mandate a final departure manifest submission at least 60 minutes prior to departure.

Completing Online Check-In ensures a faster boarding experience. Providing check-in information within 14 days of sailing is also recommended. Reviewing the provided links on Carnival’s website will answer frequently asked questions regarding the embarkation process and documentation.

U.S. Department of Homeland Security Requirements

Carnival Cruise Line is legally obligated to adhere to U.S. Department of Homeland Security (DHS) regulations. These requirements necessitate the submission of a final departure manifest containing specific guest information; This submission must occur at least 60 minutes before the ship’s departure.

To facilitate this‚ all guests are required to complete Online Check-In‚ providing necessary details and selecting an Arrival Appointment. Failure to do so by the deadline – midnight (Eastern Time) – may result in boarding delays or complications. Compliance ensures a smooth and secure sailing experience for everyone.

Check-In Deadline – Midnight (Eastern Time)

Carnival Cruise Line emphasizes the critical importance of completing Online Check-In before your Carnival Legend voyage. Guests must submit all required check-in information and select their preferred Arrival Appointment no later than midnight (Eastern Time) on the day before sailing.

This deadline is firm‚ as the U.S. Department of Homeland Security mandates a final departure manifest submission 60 minutes prior to departure. Procrastination could lead to boarding issues. Prioritize timely completion to ensure a seamless embarkation process and avoid potential delays.

Arrival Appointment Selection

Selecting an Arrival Appointment is a crucial step within Carnival’s Online Check-In process for your Carnival Legend cruise. This allows Carnival to manage boarding efficiently and comply with U.S. Department of Homeland Security requirements.

Choosing a specific time slot helps minimize wait times and ensures a smoother embarkation experience. Remember‚ this selection must be completed before the check-in deadline – midnight (Eastern Time) – as the final departure manifest is submitted 60 minutes before sailing. Prior planning with your appointment is key for a stress-free start to your vacation!

Detailed Itinerary Options for 2024

Carnival currently publishes itineraries until mid-2027‚ constantly reviewing destinations; options include Alaska‚ Transpacific‚ Hawaii‚ Mexican Riviera‚ and Panama Canal cruises.

Alaska Cruises

Embark on an unforgettable journey to the breathtaking landscapes of Alaska with Carnival Legend in 2024! While specific PDF itineraries detailing port days and excursions are best accessed via Carnival’s official website or a trusted travel agent‚ expect immersive experiences. These cruises typically feature stunning glacier views‚ wildlife spotting opportunities‚ and culturally rich port calls like Juneau‚ Skagway‚ and Ketchikan.

Carnival’s Alaska itineraries are designed to showcase the region’s natural beauty and unique charm. Guests can anticipate a range of onboard activities complementing the scenic cruising‚ alongside the convenience of the Carnival HUB app for daily schedules and information. Remember to check for updated itineraries and downloadable PDFs closer to your desired travel date.

Transpacific Cruises

Experience the adventure of crossing the Pacific Ocean with Carnival Legend’s 2024 Transpacific cruises! Detailed PDF itineraries‚ outlining port stops and sea days‚ are readily available through Carnival’s website and authorized travel professionals. These voyages typically connect North America with destinations like Hawaii or Asia‚ offering a unique blend of relaxation and exploration.

Expect extended sea days perfect for enjoying the ship’s amenities‚ coupled with exciting port calls showcasing diverse cultures and landscapes. Utilize the Carnival HUB app to stay informed about onboard events and daily schedules. Secure your preferred itinerary and downloadable PDF well in advance‚ as these cruises are highly sought after.

Hawaii Cruises

Discover paradise with Carnival Legend’s 2024 Hawaii cruises! Comprehensive PDF itineraries detailing each island visit – Oahu‚ Maui‚ Kauai‚ and the Big Island – are accessible via Carnival’s official website and through your trusted travel agent. These itineraries showcase the best of the Hawaiian Islands‚ from volcanic landscapes to pristine beaches and vibrant culture.

Plan your excursions and onboard activities using the Carnival HUB app‚ which provides a daily overview of events. Download the detailed PDF to review port schedules‚ included amenities‚ and optional extras. Booking early is recommended to secure your preferred cabin and itinerary for this popular destination.

Mexican Riviera Cruises

Embark on a sun-soaked adventure with Carnival Legend’s 2024 Mexican Riviera cruises! Detailed PDF itineraries‚ outlining stops in Cabo San Lucas‚ Puerto Vallarta‚ and Mazatlán‚ are readily available on Carnival’s website and through your travel professional. These documents provide essential information regarding port times‚ included excursions‚ and onboard entertainment schedules.

Utilize the Carnival HUB app for a real-time overview of daily activities and dining options. Download the complete itinerary PDF to meticulously plan your vacation‚ ensuring you don’t miss a moment of the vibrant Mexican culture and breathtaking coastal scenery. Secure your spot today!

Panama Canal Cruises

Experience a marvel of engineering and exotic destinations with Carnival Legend’s 2024 Panama Canal cruises! Comprehensive itinerary PDFs‚ detailing stops in Cartagena‚ Colon‚ and transit through the Panama Canal itself‚ can be found on Carnival’s official website and via your trusted travel agent. These PDFs contain crucial details about shore excursions‚ onboard events‚ and essential travel information.

Leverage the Carnival HUB app for a dynamic‚ up-to-date schedule of activities. Download the full itinerary PDF to carefully organize your journey‚ maximizing your exploration of both the Caribbean and Pacific coasts. Don’t delay – book your unforgettable adventure now!

Onboard Experience & Amenities

Carnival’s HUB App provides an overview of daily events‚ dining‚ and activities; itinerary PDFs detail all onboard experiences for a seamless cruise.

Carnival HUB App – Your Cruise Companion

The Carnival HUB App is designed to elevate your cruise experience‚ offering a convenient‚ at-a-glance overview of everything happening onboard the Carnival Legend. While the app doesn’t directly host the full itinerary PDF‚ it’s your central hub for accessing details about scheduled events‚ entertainment options‚ and dining choices that complement your planned journey.

You can view the day’s activities‚ locate restaurants‚ and even connect with fellow cruisers – all within the app. Though the detailed itinerary is best accessed as a PDF‚ the HUB App enhances your understanding and enjoyment of the cruise‚ ensuring you don’t miss a moment of the fun. It’s a fantastic tool for maximizing your vacation!

Features of the Carnival HUB App

The Carnival HUB App boasts a wealth of features designed to simplify your cruise experience‚ though it doesn’t replace the need for a detailed itinerary PDF. You’ll find an overview of daily events‚ including entertainment schedules and dining options‚ all accessible at your fingertips.

The app allows you to explore children’s programming and connect with others onboard. While the PDF provides the comprehensive itinerary‚ the HUB App offers real-time updates and convenient access to information during your voyage. It’s a powerful tool for navigating the ship and maximizing your enjoyment‚ complementing the detailed planning offered by the itinerary PDF.

Entertainment & Activities Fleet-Wide

Carnival’s fleet-wide entertainment and activities are plentiful‚ enhancing any cruise‚ but a detailed itinerary PDF remains crucial for planning. Expect a diverse range of options‚ from live music and comedy shows to themed parties and deck games. While the Carnival HUB App provides a daily overview‚ the PDF offers a complete schedule for pre-planning your fun.

These activities‚ unless specifically noted‚ are consistent across the fleet. However‚ the itinerary PDF will detail specific showtimes and locations relevant to your Carnival Legend voyage‚ ensuring you don’t miss a moment of the excitement. It’s the perfect companion to the onboard experience.

Theme Nights and Events

Carnival cruises are renowned for their vibrant theme nights and exciting events‚ and the Carnival Legend is no exception. While the Carnival HUB App offers a glimpse of daily happenings‚ a comprehensive itinerary PDF provides a full schedule for pre-cruise planning. Expect popular nights like “Elegant Night” and lively deck parties.

These events are a cornerstone of the Carnival experience‚ but specific details – times‚ locations‚ and dress codes – are best confirmed within the official itinerary PDF. This ensures you’re prepared to fully participate and maximize the fun throughout your voyage. Don’t miss out on the festivities!

Dining Options Aboard Carnival Legend

The Carnival Legend offers both included dining venues and specialty restaurants (at an additional cost)‚ details of which are found in the itinerary PDF.

Included Dining Venues

Carnival Legend boasts a variety of complimentary dining options‚ ensuring guests enjoy delicious meals throughout their voyage without extra charges. The specific venues and menus are detailed within the comprehensive 2024 itinerary PDF‚ readily available online or through your travel agent.

Typically‚ these include main dining rooms offering multi-course dinners with rotating menus‚ casual buffet-style dining for breakfast‚ lunch‚ and dinner‚ and quick-service eateries like pizzerias and delis. The itinerary PDF will outline the operating hours and locations of each included venue‚ allowing for convenient meal planning.

Guests can explore diverse culinary choices‚ catering to various tastes and preferences‚ all covered within the cruise fare. Reviewing the PDF beforehand helps maximize the onboard dining experience.

Specialty Restaurants (Additional Cost)

For a more refined dining experience‚ Carnival Legend offers specialty restaurants‚ available for an additional fee. Details regarding pricing‚ reservation procedures‚ and menu options are thoroughly outlined in the 2024 itinerary PDF. These venues provide an elevated culinary journey beyond the included dining choices.

Expect options like steakhouses serving premium cuts of meat‚ elegant seafood restaurants‚ and potentially Italian trattorias offering authentic dishes. The PDF will specify any dress code requirements and provide sample menus to aid in your selection.

Booking reservations in advance‚ often possible pre-cruise or onboard‚ is highly recommended to secure your preferred dining time. The itinerary PDF is your key resource for maximizing these premium experiences.

Travel Documentation & Requirements

The Carnival Legend itinerary PDF details required travel documents and emphasizes the importance of completing online check-in for a smooth embarkation process.

Required Travel Documents

Ensuring you have the correct travel documents is crucial for a seamless Carnival Legend cruise experience in 2024. The specific requirements depend on your citizenship and the destinations visited‚ as outlined within the detailed Carnival Legend itinerary PDF. Generally‚ U.S. citizens require a valid passport for international itineraries‚ including those to the Bahamas‚ Mexico‚ and beyond.

For closed-loop cruises – those starting and ending in the same U.S. port – a birth certificate and government-issued photo ID may suffice‚ but a passport is always recommended. Non-U.S. citizens will likely need a passport and potentially a visa‚ depending on their nationality and the cruise’s destinations. Always verify the specific requirements detailed in your Carnival Legend itinerary PDF and consult the U.S. Department of State website for the most up-to-date information.

Online Check-In Importance

Completing online check-in is paramount for a smooth embarkation on your 2024 Carnival Legend cruise. The Carnival Legend itinerary PDF emphasizes this process‚ as the U.S. Department of Homeland Security (DHS) mandates a final departure manifest submission 60 minutes before sailing. This requires all guests to provide necessary information via online check-in.

Furthermore‚ selecting an Arrival Appointment during online check-in is essential. Carnival strongly advises completing this process no later than midnight (Eastern Time) prior to departure. This streamlines boarding and minimizes delays. Details regarding online check-in‚ including links and FAQs‚ are readily available within your Carnival Legend itinerary PDF‚ ensuring a hassle-free start to your vacation.

New Ship Updates: Carnival Adventure & Encounter

Carnival Adventure and Encounter will not feature Swirls soft-serve or included burger options‚ differing from other ships in the fleet.

Swirls Soft-Serve Availability

Regarding the highly anticipated Swirls soft-serve‚ unfortunately‚ the newer ships‚ Carnival Adventure and Carnival Encounter‚ will not be equipped with this popular amenity. This deviates from the offerings found on many other vessels within the Carnival fleet. Guests who enjoy the complimentary Swirls soft-serve on other Carnival cruises should be aware of this difference when planning their voyage aboard either the Adventure or the Encounter. While these ships boast a wealth of other dining and entertainment options‚ the absence of Swirls is a notable change. Information regarding specific dining options and amenities can be found within the detailed Carnival Legend itinerary 2024 PDFs‚ available on the official Carnival website and through travel agents.

Included Burger Options

Similar to the Swirls soft-serve situation‚ Carnival Adventure and Carnival Encounter will not feature complimentary‚ included burgers as a standard offering‚ differing from many other ships in the fleet. Guests accustomed to enjoying free burgers on previous Carnival cruises should note this change when considering these newer vessels. While a variety of dining options are available‚ including specialty restaurants with additional costs‚ the complimentary burger access won’t be present. Detailed information about all dining venues‚ including pricing and menus‚ can be found within the comprehensive Carnival Legend itinerary 2024 PDFs‚ accessible via the official Carnival website or through your travel agent.

Future Itinerary Planning

Carnival Cruise Line currently publishes itineraries until mid-2027‚ with ongoing reviews for destinations and schedules beyond that timeframe; check PDFs!

Itineraries Published Until Mid-2027

Currently‚ Carnival Cruise Line has released its sailing schedules and detailed itineraries extending through the middle of 2027. This provides ample opportunity for planning your dream vacation aboard the Carnival Legend‚ or any other vessel in their impressive fleet.

For those seeking specific details regarding the 2024 sailings‚ including port schedules‚ excursion options‚ and onboard activities‚ accessing the official Carnival website or consulting with a trusted travel agent is highly recommended.

While itineraries beyond 2027 are subject to change and are continually under review‚ the published schedules offer a solid foundation for future travel arrangements. Don’t forget to explore available PDF versions of the itineraries for convenient offline access!

Ongoing Itinerary Review

Carnival Cruise Line consistently evaluates and adjusts its destination offerings and sailing routes. While itineraries are currently published through mid-2027‚ the company remains flexible‚ adapting to evolving travel trends‚ port availability‚ and guest feedback. This dynamic approach ensures the most enriching and enjoyable cruise experiences.

Regularly checking the official Carnival website or connecting with a travel professional is advisable for the latest updates. Accessing the Carnival Legend’s itinerary in PDF format allows for convenient tracking of any potential modifications.

Carnival’s commitment to itinerary refinement guarantees exciting possibilities for future voyages‚ even beyond the currently published schedules.

Important Reminders & Deadlines

Complete Online Check-in and select your Arrival Appointment within 14 days of sailing‚ but no later than midnight (Eastern Time) before departure.

Check-In Information Submission – 14 Days Prior

Ensuring a smooth embarkation process for your Carnival Legend cruise in 2024 begins with timely online check-in. Carnival Cruise Line requires all guests to submit their check-in information‚ including necessary travel documentation‚ at least 14 days prior to sailing. This crucial step allows for efficient processing and helps streamline the boarding experience.

Completing online check-in also allows you to select your preferred Arrival Appointment time‚ optimizing your embarkation day. Failure to complete this process within the specified timeframe may result in delays or complications. Accessing your itinerary PDF won’t substitute for completing the required online check-in procedures. Remember‚ a completed check-in is vital for a stress-free cruise!

Final Departure Manifest Submission (DHS) – 60 Minutes Prior

U.S. Department of Homeland Security regulations mandate that Carnival Cruise Line submit a final departure manifest containing specific guest information. This submission must occur no later than 60 minutes before the Carnival Legend’s scheduled departure. This requirement is non-negotiable and essential for legal compliance and port security.

While having your itinerary PDF readily available is helpful for personal planning‚ it doesn’t fulfill this critical DHS requirement. Guests are responsible for ensuring their check-in information is accurate and up-to-date. Late submissions can cause significant delays and potentially prevent boarding. Prioritize completing online check-in well in advance to avoid last-minute stress!

Accessing Carnival Legend Itinerary PDFs

Carnival Legend’s 2024 itineraries in PDF format are conveniently available via the official Carnival website‚ through your travel agent‚ or third-party sites.

Official Carnival Website

The official Carnival Cruise Line website serves as the primary hub for accessing detailed Carnival Legend itinerary PDFs for 2024. Navigate to the “Plan a Cruise” section and search for sailings specifically featuring the Carnival Legend. Once you’ve selected your desired cruise‚ a downloadable PDF itinerary is typically available.

This PDF will contain a day-by-day breakdown of ports of call‚ arrival and departure times‚ and often‚ suggested excursions. Ensure you are downloading from the legitimate Carnival website to avoid outdated or inaccurate information. Regularly check the site for updates‚ as itineraries can sometimes be subject to minor adjustments. The website also provides essential pre-cruise information and helpful resources for planning your voyage.

Travel Agent Resources

Experienced travel agents specializing in cruises are excellent resources for obtaining Carnival Legend itinerary PDFs. They often have direct access to the most current versions and can provide personalized assistance in understanding the details. A good agent can also explain the nuances of each itinerary‚ helping you choose the perfect cruise for your preferences.

Furthermore‚ travel agents can often secure exclusive deals or onboard credits. They can also assist with booking flights‚ pre- or post-cruise accommodations‚ and shore excursions. Don’t hesitate to leverage their expertise to streamline your cruise planning process and ensure a seamless vacation experience. They are valuable partners in crafting your ideal Carnival Legend getaway.

Third-Party Cruise Booking Sites

Numerous third-party cruise booking websites offer Carnival Legend itinerary PDFs for convenient viewing and planning. These platforms frequently compile itineraries from various sources‚ providing a centralized location to compare options and pricing. Popular sites often feature detailed cruise calendars and downloadable PDF versions of each sailing’s schedule.

However‚ always verify the PDF’s source and date to ensure it’s the most up-to-date information. Comparing prices across multiple sites is recommended‚ and be mindful of potential booking fees. These sites can be a helpful starting point‚ but always double-check details with Carnival directly or a trusted travel agent.

lumber cutting guide for chainsaw

Chainsaw Lumber Cutting: A Comprehensive Guide

This guide details essential aspects of chainsaw operation, from safety protocols and pre-cut inspections to advanced techniques․
Proper chainsaw use transforms felled trees into valuable lumber,
requiring knowledge of wood grain, chain maintenance, and emergency procedures․

Understanding chainsaw types, safety gear, and cutting methods ensures efficient and safe lumber production․
Mastering these skills allows for responsible forest management and resource utilization․

Consumer Reports testing highlights models balancing speed, handling, and safety, crucial for effective lumber cutting․

Understanding Chainsaw Types for Lumber Cutting

Selecting the right chainsaw is paramount for efficient lumber cutting, and options vary significantly․ Gas-powered chainsaws deliver substantial power, ideal for felling large trees and processing substantial volumes of wood․ They are less restricted by cords, offering greater mobility, but require more maintenance and produce emissions․

Electric chainsaws, both corded and battery-powered, present quieter, cleaner alternatives․ Corded electric saws offer consistent power but limit range, while battery-powered models provide portability, though runtime is a consideration․ These are often preferred for lighter-duty tasks like limbing and bucking․

Chainsaw size is typically categorized by bar length․ Shorter bars (14-16 inches) are suitable for small-scale work, while longer bars (18-24 inches or more) are necessary for larger trees․ Consider the diameter of the wood you’ll be cutting most frequently․

Beyond power source and bar length, features like automatic chain oilers, anti-vibration systems, and chain brakes contribute to safety and ease of use․ Consumer Reports testing evaluates these aspects, helping identify models balancing performance and user-friendliness․ Ultimately, the best chainsaw depends on your specific lumber cutting needs and the scale of your projects․

Essential Chainsaw Safety Gear

Chainsaw operation demands rigorous safety precautions, beginning with appropriate personal protective equipment (PPE)․ A properly fitted helmet with a face shield or safety glasses is crucial to protect against falling debris and potential kickback․ Hearing protection, such as earmuffs, is essential due to the chainsaw’s loud engine․

Heavy-duty chainsaw chaps or pants, constructed with ballistic nylon, provide vital leg protection, significantly reducing the risk of severe injury from accidental contact with the chain․ Sturdy, steel-toed boots offer foot protection, while gloves with reinforced palms enhance grip and shield hands․

Maintaining firm footing is paramount; always be sure of your stance before initiating a cut․ Close-fitting clothing prevents snagging, and a first-aid kit should be readily accessible․ The Tulsa District U․S․ Army Corps of Engineers emphasizes comprehensive safety training, highlighting the importance of these measures․

Remember, even with the best gear, awareness and adherence to safe operating procedures are non-negotiable․ Regular inspection of PPE for damage is also vital to ensure continued protection during lumber cutting operations․

Pre-Cutting Chainsaw Inspection

A thorough pre-cutting inspection is non-negotiable for safe and efficient chainsaw operation․ Begin by verifying the chain brake functions correctly – a critical safety feature․ Inspect the chain itself for sharpness, proper tension, and damage; a dull chain increases the risk of kickback and requires sharpening or replacement․

Check the guide bar for wear, burrs, and proper lubrication․ Ensure the chain catcher is secure and undamaged, preventing chain derailment․ Examine all handles and controls, confirming they are clean, dry, and functioning smoothly․ Verify the throttle trigger and lockout mechanism operate as intended․

Fuel and oil levels must be adequate; use the correct fuel-oil mixture as specified by the manufacturer․ Inspect the anti-vibration system for integrity, as this reduces operator fatigue and improves control․ Finally, confirm the spark plug is clean and properly gapped․

Addressing any issues discovered during the inspection before starting a cut minimizes risks and maximizes performance․ Cutting wood with a well-maintained chainsaw is far more efficient and significantly safer․

Basic Chainsaw Cutting Techniques

Mastering fundamental cutting techniques is paramount for safe and productive lumber harvesting․ Always maintain a firm grip with both hands, keeping your body positioned slightly to the side of the cutting plane․ Utilize the lower portion of the bar for increased control and reduced kickback potential․

Begin cuts with a gentle plunge, allowing the chain to establish a groove before applying full pressure․ Avoid pinching the bar, which can cause kickback; use wedges to keep the cut open, especially when felling or bucking․ Employ smooth, controlled movements, letting the chainsaw do the work – avoid forcing the cut․

Understand the concept of reaction forces; the chainsaw will tend to pull in the direction of the cut․ Anticipate these forces and adjust your stance accordingly․ Never overreach or cut above shoulder height, maintaining a stable and balanced footing at all times․

Practice these techniques on smaller branches before tackling larger logs․ Consistent, deliberate cuts yield cleaner results and minimize the risk of accidents․ Remember, safety and control are always the top priorities․

Felling Small Trees: A Step-by-Step Approach

Felling even small trees demands careful planning and execution․ First, assess the tree’s lean and potential falling direction, considering wind and surrounding obstacles․ Clear a work area around the tree, establishing escape routes at 45-degree angles from the anticipated fall line․

Begin with an open-faced notch cut on the side of the tree facing the desired fall direction․ This notch should be approximately one-fifth to one-third of the tree’s diameter․ Next, make a back cut, slightly higher than the notch’s base, leaving a hinge of uncut wood․

The hinge controls the fall; ensure it’s uniform in thickness․ As the tree begins to fall, immediately retreat along your pre-planned escape route․ Avoid cutting completely through the tree, as this eliminates control․

If the tree doesn’t fall as expected, do not attempt to force it․ Re-evaluate the situation and consider using wedges or a winch to assist the process․ Prioritize safety and never risk being struck by the falling tree․

Bucking Logs: Safe and Efficient Methods

Bucking, or cutting felled logs into manageable lengths, requires a stable and secure setup․ Always ensure the log is supported to prevent pinching the chainsaw bar during the cut․ Utilize log jacks or other supports to elevate the log, creating working space․

Begin by assessing the log for internal stresses – look for bends or compression wood․ Make relief cuts on the compression side first to prevent the bar from binding․ These cuts release tension, allowing for smoother, safer bucking․

Avoid plunging cuts, which are incredibly dangerous․ Instead, bore in carefully, maintaining control of the chainsaw․ When bucking larger diameter logs, consider a three-cut method: an undercut, a top cut, and then completing the cut from the opposite side․

Never cut above mid-chest height and always maintain a firm grip on the chainsaw with both hands․ Be mindful of the log’s potential to roll or shift during the cutting process, and prioritize a clear escape path․

Limbing Techniques for Processed Lumber

Limbing, the removal of branches from a felled tree, is a hazardous task demanding focused attention․ Always work from the base of the tree towards the top, maintaining a stable stance and keeping the tree between you and the cutting path․

Utilize proper cutting techniques to avoid kickback․ Avoid cutting with the tip of the bar, and be aware of branch tension․ Smaller branches can often be removed with a single cut, but larger limbs may require notching to prevent tearing or pinching․

When limbing, support the branch with your hand or foot to prevent it from splitting and potentially causing injury․ Be especially cautious with overhead limbs, ensuring a clear working space and a safe escape route should the branch fall unexpectedly․

A sharp chain is crucial for efficient and safe limbing․ Dull chains require more force, increasing the risk of losing control․ Regularly inspect the chain and sharpen as needed․ Prioritize safety and controlled movements throughout the limbing process․

Dealing with Kickback: Prevention and Response

Kickback, a sudden, uncontrolled upward or backward movement of the chainsaw, is a leading cause of chainsaw injuries․ Understanding its causes and practicing preventative measures are paramount for safe operation․

Kickback typically occurs when the upper quadrant of the bar’s tip contacts an object, or when the wood closes in and pinches the chain․ To prevent kickback, avoid using the tip of the bar, maintain a firm grip with both hands, and keep your body positioned to the side of the cutting plane․

Always be aware of the wood’s tension and compression․ Utilize techniques like bore cutting to relieve stress and reduce the risk of pinching․ Ensure the chain is sharp and properly tensioned, as a dull chain increases the likelihood of kickback․

If kickback occurs, do not attempt to fight it․ Release the throttle and allow the saw to move․ Maintain a firm grip, but avoid resisting the force․ Immediately shut off the chainsaw and assess the situation before resuming work․

Chainsaw Chain Maintenance and Sharpening

Maintaining a sharp and properly tensioned chainsaw chain is crucial for efficient cutting, operator safety, and prolonged chain life․ A dull chain requires more force, increasing the risk of kickback and operator fatigue․

Regularly inspect the chain for damage, including cracked or missing teeth․ Clean the chain after each use, removing sawdust and debris with a brush and solvent․ Check chain tension frequently; a properly tensioned chain should be snug against the bar but still able to be pulled around by hand․

Sharpening can be done with a file, electric grinder, or by a professional․ When filing, maintain the correct filing angle and depth gauge․ Ensure all teeth are sharpened to the same length for balanced cutting․ A rounded-over tooth indicates excessive wear and necessitates chain replacement․

Cutting wood with a dull chainsaw is inefficient and dangerous․ Consistent maintenance, including cleaning, tensioning, and sharpening, will optimize performance and minimize risks during lumber cutting operations․

Understanding Wood Grain and Cutting Direction

Comprehending wood grain and its influence on cutting direction is paramount for safe and efficient lumber harvesting․ Wood isn’t uniform; grain patterns dictate how it splits and responds to the chainsaw․ Cutting with the grain generally requires less effort and produces cleaner cuts, minimizing splintering and tear-out․

Identify the grain direction before initiating any cut․ Look for the natural lines and patterns within the wood․ Avoid cutting against the grain whenever possible, especially when felling or bucking logs․ This can cause the saw to bind, increasing the risk of kickback․

Consider the tree’s lean and the prevailing wind direction when felling․ Utilize appropriate notching and back-cutting techniques to guide the tree’s fall along the desired path, working with the natural stresses within the wood․ Don’t cut anything above mid-chest height, and be mindful of log diameter relative to blade length․

Understanding these principles enhances control, reduces strain on the chainsaw, and ultimately improves the quality of the resulting lumber․

Safe Transport and Storage of Chainsaws

Proper transport and storage are crucial for maintaining chainsaw functionality and preventing accidents․ Always ensure the chainsaw is completely cooled before transport․ Engage the chain brake and utilize the scabbard to fully cover the chain, protecting it and preventing accidental contact․

When transporting in a vehicle, secure the chainsaw to prevent shifting or rolling․ A dedicated chainsaw case is ideal, but if unavailable, ensure it’s firmly restrained․ Never transport a running chainsaw, even for short distances․

For storage, choose a dry, secure location inaccessible to children and unauthorized personnel․ Store the chainsaw with the chain brake engaged and the scabbard in place․ Regularly inspect the chainsaw for any damage or leaks before storage․

Consider draining the fuel tank for long-term storage to prevent fuel degradation and carburetor issues․ A well-maintained and securely stored chainsaw is a safe and reliable tool, ready for the next lumber-cutting task․

Common Chainsaw Cutting Mistakes to Avoid

Many chainsaw mishaps stem from preventable errors․ A frequent mistake is cutting above mid-chest height, increasing instability and risk․ Never attempt to cut a tree exceeding the blade’s length in diameter – this can cause pinching and kickback․

Insufficient footing is a major hazard; always maintain a stable stance․ Neglecting to assess the tree’s lean and surrounding obstacles leads to unpredictable falls․ Using a dull chain requires excessive force, increasing fatigue and the chance of losing control․

Failing to properly maintain the chain – sharpening and tensioning – drastically reduces efficiency and safety․ Ignoring kickback prevention techniques, like keeping a firm grip and avoiding the tip of the bar, is perilous․

Rushing the process and skipping safety checks are common errors․ Prioritizing speed over caution inevitably leads to mistakes․ Remember, a slow, deliberate approach is far safer and ultimately more productive․

Choosing the Right Chainsaw Blade for Different Woods

Selecting the appropriate chainsaw blade is crucial for efficient and safe lumber cutting․ Different wood types demand specific chain designs for optimal performance․ For softwood like pine and fir, a lower rake angle (around 10 degrees) and fewer teeth per inch (TPI) – typically 3-4 – facilitate faster cutting․

Hardwoods, such as oak and maple, require blades with a higher rake angle (around 30-40 degrees) and more teeth per inch (6-8 TPI)․ This configuration provides a more aggressive bite and handles the denser material effectively․

For particularly abrasive woods or those containing significant dirt, carbide-tipped blades offer extended durability․ Rip chains, designed for cutting with the grain, excel at bucking logs into desired lengths․

Consider the wood’s condition; frozen or wet wood benefits from blades with larger gullets to efficiently clear chips․ A dull chain, regardless of type, is dangerous and inefficient – regular sharpening is paramount․

Advanced Cutting Techniques: Notching and Borer Cuts

Mastering notching and borer cuts elevates chainsaw lumber cutting precision and control․ Notching, typically used in felling, creates a directional hinge controlling the tree’s fall․ A conventional notch involves a top cut angled downwards meeting a horizontal bottom cut, forming a wedge․

Borer cuts, also known as plunge cuts, involve inserting the chainsaw tip directly into the wood, requiring extreme caution and control to prevent kickback․ These are useful for removing large sections of wood or creating access points․

Successful notching demands accurate angle estimation and consistent depth․ Borer cuts necessitate a firm grip, controlled plunge, and awareness of internal stresses within the wood․

Always prioritize safety; avoid overreaching and maintain a stable stance․ Practice these techniques on smaller logs before tackling larger trees․ Proper planning and understanding wood grain are essential for clean, accurate cuts․

Remember to never cut above mid-chest height․

Emergency Procedures and First Aid for Chainsaw Injuries

Despite rigorous safety measures, chainsaw injuries can occur․ Immediate and appropriate response is critical․ The most common injuries include cuts, lacerations, and fractures․ Prioritize scene safety – shut off the chainsaw and ensure the area is secure․

For severe bleeding, apply direct pressure to the wound with a clean cloth and elevate the injured limb․ Tourniquets should only be used as a last resort, and only if you’re trained in their application․

Suspected fractures require immobilization of the injured area․ Do not attempt to move the injured person unless absolutely necessary․

Crucially, seek professional medical attention immediately for all but the most minor injuries․ Know your location for emergency services․ A well-stocked first-aid kit, including bandages, antiseptic wipes, and a trauma dressing, is essential on any job site․

Recent training courses, like those held by the U․S․ Army Corps of Engineers, emphasize proactive safety and emergency preparedness․

jeff nippard hypertrophy program pdf

Jeff Nippard Hypertrophy Program PDF: A Comprehensive Plan

Jeff Nippard’s hypertrophy program, often sought in PDF format, emphasizes a science-based approach to muscle growth. It’s a structured plan,
drawing from biomechanics and physiology, aiming for optimal results.

The program’s core philosophy revolves around maximizing mechanical tension, metabolic stress, and muscle damage—key drivers of hypertrophy.
It’s a detailed guide for serious lifters.

Accessing the complete program typically requires a paid subscription, though Nippard offers free content providing foundational principles.
The PDF provides a comprehensive roadmap for building muscle effectively.

Program Overview & Philosophy

Jeff Nippard’s hypertrophy program isn’t just another workout routine; it’s a meticulously crafted system built upon a foundation of scientific principles. The overarching philosophy centers on maximizing the three primary mechanisms of muscle growth: mechanical tension, metabolic stress, and muscle damage. Nippard doesn’t advocate for chasing the latest fitness fads, but instead prioritizes evidence-based training methodologies.

The program distinguishes itself through its emphasis on progressive overload, not simply adding weight, but strategically manipulating variables like volume, frequency, and intensity. It’s designed to be adaptable, recognizing that individual responses to training vary. Nippard’s approach acknowledges the importance of both compound and isolation exercises, integrating them thoughtfully to target all muscle groups comprehensively.

A key tenet is the understanding that hypertrophy isn’t solely about the gym; it’s a holistic process. Therefore, the program implicitly acknowledges the crucial roles of nutrition and recovery. While the PDF primarily focuses on training, it sets the stage for optimizing these other vital components. It’s a program geared towards individuals serious about building muscle through a smart, sustainable approach.

The Science Behind Nippard’s Approach

Jeff Nippard’s program isn’t built on bro-science; it’s deeply rooted in exercise physiology, biomechanics, and current research on muscle hypertrophy. He meticulously analyzes studies on muscle protein synthesis, mechanical tension, and the impact of different training variables. Nippard’s approach emphasizes the importance of maximizing time under tension, a key driver of muscle damage and subsequent growth.

The program’s structure reflects an understanding of the length-tension relationship, optimizing exercise selection and execution for maximal muscle activation. Nippard’s emphasis on progressive overload isn’t arbitrary; it’s based on the principle that muscles adapt to stress, requiring continually increasing demands to stimulate further growth. He also incorporates concepts from periodization, strategically varying training volume and intensity to prevent plateaus.

Furthermore, Nippard’s methodology acknowledges the role of metabolic stress, utilizing techniques like drop sets and rest-pause sets to enhance muscle fullness and promote hormonal responses. His approach isn’t dogmatic, but rather a synthesis of evidence-based principles, constantly refined based on new scientific findings.

Target Audience & Experience Level

Jeff Nippard’s hypertrophy program isn’t designed for absolute beginners. While foundational lifting knowledge is helpful, the program is best suited for individuals with at least 6-12 months of consistent resistance training experience. It caters to those who understand basic exercise form and are comfortable with compound lifts like squats, deadlifts, and bench presses.

The program’s complexity and volume make it ideal for intermediate to advanced lifters seeking to break through plateaus and optimize their muscle-building potential. Nippard acknowledges that advanced trainees often require more sophisticated strategies than simple linear progression. He targets individuals willing to commit to a structured plan and track their progress diligently.

However, the program’s detailed explanations and emphasis on proper form also make it valuable for experienced lifters looking to refine their technique and deepen their understanding of hypertrophy principles. It’s a resource for those who want to move beyond guesswork and embrace a science-backed approach to training.

Program Duration & Phases

Jeff Nippard’s hypertrophy program typically spans 12-16 weeks, structured into distinct phases designed to maximize muscle growth and prevent plateaus. The program isn’t a one-size-fits-all approach; it incorporates periodization to systematically vary training variables over time.

Generally, the initial phase (4-6 weeks) focuses on building a solid foundation of muscle endurance and improving work capacity with moderate volume and intensity. This is followed by a hypertrophy-focused phase (6-8 weeks) emphasizing higher volume and moderate to high intensity to stimulate muscle protein synthesis.

The final phase (2-4 weeks) often incorporates a deload week to allow for recovery, followed by a strength-focused block to consolidate gains and prepare for future training cycles. Nippard’s program emphasizes the importance of cyclical training, preventing overtraining and optimizing long-term progress. The PDF details each phase’s specific parameters.

Training Frequency & Split

Jeff Nippard’s hypertrophy program advocates for a training frequency of 4-6 sessions per week, depending on the individual’s experience level and recovery capacity. A key principle is hitting each muscle group at least twice per week to maximize muscle protein synthesis.

The program commonly employs an upper/lower split, where upper body muscles are trained on separate days from lower body muscles. Alternatively, a push/pull/legs split is also utilized, grouping exercises based on movement patterns. Nippard’s approach isn’t rigid; variations exist to suit individual preferences.

More advanced lifters may benefit from a full-body approach, training all major muscle groups in each session, but with careful attention to volume management. The PDF provides detailed workout schedules and guidance on adjusting frequency and split based on individual needs and recovery. Prioritizing consistent training is crucial.

Exercise Selection: Compound Lifts

Jeff Nippard’s hypertrophy program places significant emphasis on compound lifts as the foundation of muscle-building. These exercises, engaging multiple muscle groups simultaneously, are crucial for maximizing mechanical tension and overall strength gains.

Core compound movements include variations of the squat (back squat, front squat), deadlift (conventional, sumo, Romanian), bench press (flat, incline, decline), and overhead press. Nippard advocates for prioritizing these lifts early in workouts when energy levels are highest.

The program details proper form and technique for each lift, emphasizing controlled movements and a full range of motion. Variations are introduced to address individual biomechanics and prevent plateaus. The PDF provides detailed exercise demonstrations and cues. He also suggests incorporating unilateral variations to address imbalances.

Exercise Selection: Isolation Exercises

Jeff Nippard’s hypertrophy program strategically incorporates isolation exercises to target specific muscle groups and address individual weaknesses. While compound lifts form the base, isolation work enhances muscle development and improves overall physique balance.

Common isolation exercises featured in the program include bicep curls (various grips), triceps extensions (cable, overhead), lateral raises, rear delt flyes, leg extensions, and hamstring curls. Nippard emphasizes selecting exercises that effectively isolate the intended muscle, minimizing involvement from surrounding groups.

The PDF details optimal form and execution for each isolation exercise, focusing on controlled movements and peak contraction. Nippard suggests using these exercises to “finish” muscle groups after compound lifts, maximizing hypertrophy. He also advocates for incorporating drop sets and other intensity techniques to further stimulate muscle growth.

Rep Ranges & Sets

Jeff Nippard’s hypertrophy program doesn’t adhere to a single “best” rep range, instead advocating for a periodized approach. The PDF outlines varying rep schemes to stimulate different hypertrophic adaptations and prevent plateaus. Generally, the program utilizes a blend of rep ranges, typically falling between 6-12, 8-15, and 15-20+.

Lower rep ranges (6-12) are often employed for compound lifts, prioritizing strength and mechanical tension. Moderate rep ranges (8-15) are common for both compound and isolation exercises, balancing tension and metabolic stress. Higher rep ranges (15-20+) are utilized for isolation exercises or as finishing movements to maximize muscle fatigue.

Set volume is also periodized, ranging from 3-5 sets per exercise depending on the exercise type and training phase. Nippard emphasizes the importance of reaching proximity to failure on each set to maximize muscle fiber recruitment and stimulate growth. The PDF provides detailed guidelines for adjusting sets and reps based on individual progress.

Progressive Overload Strategies

Jeff Nippard’s hypertrophy program places significant emphasis on progressive overload as the cornerstone of muscle growth. The PDF details multiple strategies to consistently challenge muscles and drive adaptation, moving beyond simply adding weight. These methods are crucial for long-term progress and preventing plateaus.

Linear progression – increasing weight each workout – is initially recommended, but Nippard stresses the importance of transitioning to more nuanced techniques. These include adding reps with the same weight, decreasing rest periods, improving exercise technique, and increasing sets.

The program also incorporates autoregulation, encouraging lifters to adjust weight based on daily readiness and performance. Deload weeks are strategically implemented to allow for recovery and prevent overtraining. Nippard advocates for tracking workouts meticulously to monitor progress and identify areas for improvement, ensuring consistent overload and optimal results.

Rest Periods & Tempo

Jeff Nippard’s hypertrophy program meticulously addresses rest periods and tempo, recognizing their crucial role in maximizing muscle growth. The PDF doesn’t prescribe a one-size-fits-all approach, instead advocating for adjustments based on exercise type and intensity.

For compound lifts, Nippard generally recommends longer rest periods (2-3 minutes) to allow for sufficient recovery between heavy sets. Isolation exercises typically utilize shorter rest intervals (60-90 seconds) to increase metabolic stress.

Tempo, defined as the speed of each repetition phase, is also carefully considered. Nippard often prescribes a controlled eccentric (lowering) phase, lasting 2-4 seconds, followed by a more explosive concentric (lifting) phase. This maximizes time under tension and muscle fiber recruitment. The program emphasizes mindful execution over simply rushing through reps, promoting optimal muscle activation and growth.

Warm-up & Cool-down Protocols

Jeff Nippard’s hypertrophy program PDF places significant emphasis on proper warm-up and cool-down routines, recognizing their importance for injury prevention and recovery. The program doesn’t overlook these often-neglected components of training.

Warm-ups typically begin with general cardiovascular activity, like light cardio, to increase blood flow and body temperature. This is followed by dynamic stretching, focusing on movements that mimic the exercises in the workout. Specific warm-up sets with lighter weights are also recommended before each exercise.

Cool-downs involve static stretching, holding each stretch for 30-60 seconds, to improve flexibility and reduce muscle soreness. Nippard also suggests incorporating foam rolling or other self-myofascial release techniques to further enhance recovery. These protocols aren’t merely afterthoughts; they are integral to the program’s holistic approach to hypertrophy and long-term training sustainability;

Nutrition Guidelines for Hypertrophy

Jeff Nippard’s hypertrophy program PDF strongly advocates for a nutrition strategy tailored to support muscle growth. It’s not simply about lifting weights; fueling the body appropriately is paramount. The program emphasizes a caloric surplus, consuming more calories than expended, to provide the energy needed for muscle protein synthesis.

Protein intake is a cornerstone, with recommendations typically ranging from 0.8 to 1 gram per pound of body weight daily. Carbohydrates are also crucial, providing energy for workouts and replenishing glycogen stores. Healthy fats are included for hormonal balance and overall health.

Nippard stresses the importance of nutrient timing, suggesting consuming protein and carbohydrates around workout windows. He also highlights the benefits of prioritizing whole, unprocessed foods. The PDF provides detailed guidance on macronutrient ratios and meal planning, ensuring individuals have the nutritional tools to maximize their hypertrophy potential.

Supplementation Recommendations

Jeff Nippard’s hypertrophy program PDF doesn’t position supplements as magical solutions, but rather as potential tools to optimize results when a solid foundation of training and nutrition is already in place. He emphasizes evidence-based supplementation, steering clear of hype and focusing on what’s scientifically supported.

Creatine monohydrate is consistently recommended, due to its proven benefits for strength, power, and muscle volume. Whey protein is suggested as a convenient way to increase protein intake, particularly post-workout. Caffeine is also mentioned for its performance-enhancing effects.

The PDF clarifies that supplements are not essential, and individual needs may vary. Nippard cautions against relying heavily on supplements and stresses the importance of prioritizing whole foods. He provides a balanced perspective, outlining potential benefits and drawbacks of various supplements, empowering users to make informed decisions.

Common Mistakes & Troubleshooting

Jeff Nippard’s hypertrophy program PDF proactively addresses potential pitfalls and offers solutions to common challenges. A frequent mistake is insufficient progressive overload – failing to consistently increase weight, reps, or sets over time. The program emphasizes meticulous tracking to avoid plateaus.

Another common error is neglecting proper form in pursuit of heavier weights. Nippard stresses technique over ego, advocating for deload weeks to address fatigue and prevent injury. Troubleshooting often involves assessing training volume, ensuring adequate recovery, and adjusting exercise selection.

The PDF also highlights the importance of realistic expectations and consistency. It acknowledges that progress isn’t always linear and provides guidance on how to navigate setbacks. Nippard encourages self-assessment and adjustments based on individual responses, promoting a sustainable approach to hypertrophy training.

PDF Program Content Breakdown

Jeff Nippard’s hypertrophy program PDF is meticulously structured, offering a comprehensive guide to muscle growth. It begins with a detailed overview of the program’s philosophy and scientific underpinnings, explaining the rationale behind each component.

The core of the PDF outlines the training split, frequency, and phases, detailing specific exercises for each muscle group. It includes clear exercise demonstrations, emphasizing proper form and technique. Rep ranges, sets, and rest periods are precisely defined, alongside progressive overload strategies.

Furthermore, the PDF provides in-depth guidance on warm-up and cool-down protocols, nutrition for hypertrophy, and supplementation recommendations. Troubleshooting sections address common issues, and customization options cater to individual needs. The document serves as a complete, self-contained resource for maximizing training results.

Accessing the Full Program (Paid vs. Free Resources)

Jeff Nippard’s complete hypertrophy program is primarily available through a paid subscription on his website. This grants access to the detailed PDF, encompassing all phases, exercise variations, and personalized guidance. The paid version offers a structured, progressive plan for optimal results, alongside community support.

However, Nippard also provides a wealth of free resources, including YouTube videos and articles, outlining foundational principles of hypertrophy training. These resources offer valuable insights into his approach, but lack the comprehensive structure and detailed programming of the paid program.

Essentially, the free content serves as an introduction, while the paid PDF delivers a complete, tailored plan. Considering the depth and specificity of the program, a paid subscription is recommended for those seeking a fully optimized hypertrophy experience. It’s a trade-off between accessibility and comprehensive guidance.

Program Variations & Customization

Jeff Nippard’s hypertrophy program, while structured, acknowledges individual needs and preferences, allowing for variations and customization. The PDF provides a solid framework, but encourages users to adapt it based on experience level, equipment access, and recovery capabilities.

For advanced lifters, Nippard suggests increasing training frequency or incorporating more advanced techniques like drop sets or rest-pause sets. Conversely, beginners may benefit from reducing volume or simplifying exercise selection. The program isn’t rigid; it’s a template for progress.

Customization also extends to exercise selection. While Nippard provides recommendations, substitutions can be made based on individual anatomy and comfort. Prioritizing proper form and progressive overload remains crucial, regardless of variations implemented. Ultimately, the goal is to tailor the program for sustainable, long-term muscle growth.

honeywell round thermostat manual

Honeywell Round Thermostat Manual: A Comprehensive Guide

Honeywell’s iconic round thermostats, like the T-86 and newer Lyric models, require detailed manuals for optimal use; this guide offers comprehensive support and troubleshooting.

Honeywell round thermostats represent a legacy of temperature control, beginning with the groundbreaking T-86 in 1953. These thermostats, evolving into models like the Lyric Round and RTH9580WF, are known for their simplicity and reliability.

This guide focuses on understanding and utilizing these devices, from basic manual operation (T87N1018/U) to advanced smart features. Whether you own a discontinued model (CT87K1004) or a current HomeKit-enabled version, this resource provides essential information. We’ll cover functionality, installation, troubleshooting, and accessing support materials, ensuring comfortable and efficient home climate management.

Historical Significance: The Iconic Honeywell T-86

Introduced in 1953, the Honeywell T-86 revolutionized home climate control with its distinctive circular design. Before its arrival, thermostats were typically bulky, rectangular boxes. The T-86’s aesthetic appeal and user-friendly interface quickly made it a household staple, becoming almost synonymous with the concept of a thermostat itself.

Its enduring design influenced subsequent Honeywell round thermostat models, including the Lyric Round. While technology has advanced, the T-86’s legacy persists, representing a pivotal moment in home automation and design. Understanding its history provides context for appreciating the evolution of these essential devices.

Popular Honeywell Round Thermostat Models

Honeywell offers a range of round thermostats catering to diverse needs. The T87N1018/U is a popular manual model with a Fahrenheit scale, providing simple temperature control. The CT87K1004, though discontinued, was a heat-only option, also in Fahrenheit. Details on the CT87N1019 require further investigation, as specific features are less readily available.

More recently, the Lyric Round and RTH9580WF (Smart Wi-Fi) have gained prominence, offering smart home integration and advanced features. Understanding the differences between these models is crucial when consulting a Honeywell round thermostat manual.

T87N1018/U: Round Manual Thermostat with Fahrenheit Plate

The T87N1018/U is a basic, round, manual Honeywell thermostat displaying temperatures in Fahrenheit. Its simplicity makes it user-friendly, requiring no programming or Wi-Fi connection. A manual adjustment dial controls the desired temperature setting. The manual for this model details how to adjust the dial to achieve the preferred heating or cooling level.

Troubleshooting typically involves verifying proper battery installation and ensuring the dial isn’t obstructed. While lacking smart features, its reliability and straightforward operation are key benefits, as outlined in the official Honeywell documentation.

CT87K1004: Round Heat Only Thermostat (Fahrenheit) ⏤ Discontinued

The CT87K1004 is a round, heat-only thermostat displaying temperatures in Fahrenheit, now discontinued by Honeywell. Its manual focuses on controlling heating systems exclusively, lacking cooling functionality. Operation involves a dial to set the desired temperature, with clear Fahrenheit markings. Finding a dedicated manual can be challenging due to its discontinuation.

However, similar Honeywell models’ manuals can offer guidance. Troubleshooting typically involves checking battery power and verifying wiring connections. Despite being outdated, its simplicity remains a benefit for basic heating control, as detailed in archived resources.

CT87N1019: Specific Model Details (Further Research Needed)

Information regarding the Honeywell CT87N1019 round thermostat is currently limited, necessitating further investigation for a comprehensive manual overview. While identified as a Honeywell product, specific features and functionalities remain unclear without detailed documentation. It appears to be a manual model, potentially offering basic heating or combined heating and cooling control.

Locating a dedicated user guide proves difficult; online forums and Honeywell’s support resources are potential avenues for discovery. Research is ongoing to determine its compatibility and operational characteristics, aiming to provide a complete understanding of this specific thermostat model.

Understanding Basic Thermostat Functions

Honeywell round thermostats, even manual versions like the T87N1018/U, share core functions. Temperature control is primary, adjusted via a dial or slider to set the desired room temperature. Understanding heat vs. cool modes is crucial; a selector switch determines whether the thermostat activates heating or cooling systems.

Many models feature markings indicating temperature scales (Fahrenheit). Proper operation involves setting the desired temperature and selecting the appropriate mode based on seasonal needs. Familiarizing yourself with these basics ensures efficient and comfortable climate control within your home.

Temperature Control and Setting

Honeywell round thermostats offer straightforward temperature control. Manual models, like the T87N1018/U, utilize a rotating dial to select the desired temperature, indicated by markings on the thermostat face. The scale, typically Fahrenheit, displays corresponding temperature values.

Setting the temperature involves rotating the dial until the desired value aligns with the indicator. Some models feature a noticeable “click” for precise adjustments. Understanding the dial’s responsiveness is key to achieving accurate temperature settings. Regularly checking and adjusting ensures consistent comfort levels within your home.

Heat vs. Cool Modes

Honeywell round thermostats often feature a selector switch to choose between Heat and Cool modes. This determines whether the thermostat activates the heating or cooling system. The switch’s position dictates the system’s operation, ensuring appropriate climate control based on the season.

In Heat mode, the thermostat activates the furnace when the temperature drops below the setpoint. Conversely, in Cool mode, it activates the air conditioner when the temperature exceeds the setpoint. Proper mode selection is crucial for efficient and comfortable operation. Always verify the correct setting for optimal performance.

Lyric Round Thermostat: A Smart Home Integration

Honeywell’s Lyric Round thermostat represents a leap into smart home technology, offering features beyond traditional models. It seamlessly integrates with modern ecosystems, providing enhanced control and convenience. This thermostat distinguishes itself through Wi-Fi connectivity, enabling remote access and management via a smartphone app.

The Lyric Round also boasts HomeKit compatibility, allowing users to control the thermostat using Siri voice commands. This integration simplifies temperature adjustments and automation within the Apple smart home environment. These features elevate the user experience, offering a modern approach to home climate control.

HomeKit Compatibility and Siri Control

Honeywell’s Lyric Round thermostat’s HomeKit integration unlocks voice control via Siri, streamlining temperature adjustments. Users can simply ask Siri to raise or lower the temperature, creating a hands-free experience. This compatibility extends to Apple’s Home app, allowing for the creation of scenes and automations involving the thermostat.

Setting up HomeKit involves scanning the Lyric Round’s setup code within the Home app. Once connected, the thermostat becomes a seamless part of the Apple smart home ecosystem, offering convenient and intuitive control. This feature is ideal for those invested in the Apple ecosystem.

Wi-Fi Connectivity and Remote Access

Lyric Round thermostats boast built-in Wi-Fi, enabling remote control through the Honeywell Home app on smartphones or tablets. This feature allows users to adjust temperatures, view energy usage, and manage schedules from anywhere with an internet connection.

Setting up Wi-Fi connectivity requires downloading the Honeywell Home app and following the on-screen instructions to connect the thermostat to your home network. Remote access provides convenience and potential energy savings, allowing adjustments even when away from home. The app offers a user-friendly interface for managing thermostat settings.

RTH9580WF: Honeywell’s Smart Wi-Fi Thermostat

Honeywell’s RTH9580WF is a sophisticated Smart Wi-Fi Thermostat offering advanced programmability and remote control. While its construction is primarily plastic, it delivers robust functionality. Users can manage settings via the Honeywell Home app, mirroring the Lyric Round’s capabilities, but with a different interface.

This model excels in programmable scheduling, allowing customized temperature settings for different times of day and days of the week. The Wi-Fi connectivity enables remote access and monitoring, contributing to energy efficiency. Detailed setup instructions are available in the accompanying manual and online resources.

Discontinued Models and Finding Support

Honeywell has discontinued several round thermostat models, such as the CT87K1004. Finding manuals for these older units can be challenging, but not impossible. The Honeywell Home website often archives documentation, and online forums dedicated to Honeywell products are valuable resources.

For troubleshooting common issues with discontinued models, searching online communities and utilizing archived manuals is crucial. Many users share their experiences and solutions. Remember to accurately identify your model number (e.g., T87N1018/U) to locate the correct support materials.

Locating Manuals for Older Models

Finding manuals for discontinued Honeywell round thermostats requires a bit of detective work. Start with the Honeywell Home website’s archive section; they often retain documentation for older products. Explore online forums and communities dedicated to Honeywell, where users frequently share scanned manuals or links to archived resources.

Websites specializing in vintage appliance manuals can also prove helpful. When searching, be precise with the model number (like CT87N1019) to narrow results. If digital copies are unavailable, consider contacting Honeywell’s customer support, though availability is not guaranteed.

Troubleshooting Common Issues

Common problems with Honeywell round thermostats include unresponsive displays or inaccurate temperature readings. First, check the batteries, ensuring they are fresh and correctly installed. For unresponsive units, verify proper wiring connections, referencing the installation guide. Inaccurate readings may indicate thermostat placement issues – avoid direct sunlight or drafts.

If problems persist, reset the thermostat according to the manual’s instructions. Online forums offer solutions for specific models like the RTH9580WF. Remember safety precautions; if unsure, consult a qualified HVAC technician.

Humidity Sensing Capabilities

Certain Honeywell round thermostat models, particularly newer smart versions, incorporate humidity sensing. This feature allows for more precise comfort control, as humidity significantly impacts how temperature is perceived. The thermostat displays current humidity levels and can be programmed to adjust heating or cooling to maintain optimal conditions.

Humidity control can help prevent mold growth and improve air quality. Refer to your specific model’s manual for details on accessing and utilizing these capabilities, as functionality varies between models like the Lyric Round.

IIIF and Digital Preservation of Honeywell Thermostats

The International Image Interoperability Framework (IIIF) is increasingly used for the digital preservation of cultural artifacts, including historical Honeywell round thermostats like the T-832. IIIF enables researchers to access high-resolution images and metadata, facilitating detailed study and comparison.

This approach ensures long-term accessibility of these iconic designs, even as physical examples become rarer. Digital preservation efforts, utilizing IIIF, contribute to understanding the evolution of thermostat technology and its cultural significance, alongside readily available manuals.

Comparing Honeywell Round Thermostats to Nest

While Nest thermostats popularized a sleek, modern aesthetic, Honeywell’s round models, particularly the Lyric Round, offer a compelling alternative with smart home integration. Honeywell provides a range of options, from basic manual controls detailed in their manuals, to Wi-Fi enabled models with geofencing.

Compared to Nest’s learning algorithms, Honeywell focuses on user-defined schedules and remote access. Though Nest’s construction is often praised, Honeywell’s legacy and diverse product line, supported by extensive documentation, cater to varied needs and budgets.

Energy Saving Features and Programmability

Honeywell Round Thermostat Manuals emphasize programmable features for energy conservation. Models like the RTH9580WF allow customized schedules, reducing energy consumption when the home is unoccupied. Geofencing, available on some Lyric models, adjusts temperatures based on proximity, further optimizing efficiency.

Even basic round thermostats benefit from mindful temperature settings, as outlined in their respective manuals. Smart features, when enabled, learn usage patterns, while manual adjustments offer direct control. Understanding these features, detailed in the documentation, is key to maximizing savings.

Installation Considerations

Honeywell Round Thermostat Manuals stress the importance of proper wiring. Wiring diagrams are crucial for compatibility, especially when replacing older models. Always disconnect power before installation, a key safety precaution detailed in every manual. Compatibility with existing HVAC systems varies; consult the manual for specific requirements.

Incorrect wiring can damage the thermostat or HVAC system. The manual provides step-by-step instructions, but professional installation is recommended if unsure. Ensure the thermostat is mounted securely and away from direct sunlight or drafts for accurate readings, as highlighted in installation guides.

Wiring Diagrams and Compatibility

Honeywell Round Thermostat Manuals dedicate significant sections to wiring diagrams, varying by model (T87N1018/U, CT87K1004, etc.). These diagrams illustrate connecting wires labeled R, W, Y, G, and C to your HVAC system. Compatibility is key; older systems may require a “C-wire” (common wire) for power, often needing an adapter if absent.

The manual emphasizes matching wire colors to terminal designations. Incorrect wiring can cause malfunctions or damage. Always consult the manual specific to your thermostat model. Online resources and Honeywell Home support can assist with deciphering complex wiring scenarios and ensuring system compatibility.

Safety Precautions During Installation

Honeywell Round Thermostat Manuals prominently feature safety precautions. Crucially, always disconnect power to your HVAC system at the breaker before beginning installation to avoid electrical shock. The manual advises labeling wires before disconnecting them to prevent miswiring.

Use appropriate tools and follow all local electrical codes. If unsure about any step, consult a qualified HVAC technician. Avoid forcing wires into terminals; ensure a secure connection. Manuals warn against installing thermostats in damp or corrosive environments. Prioritize safety throughout the process for a successful and hazard-free installation.

Advanced Features (Depending on Model)

Honeywell Round Thermostat Manuals detail advanced features varying by model. Lyric Round thermostats offer scheduling and geofencing, adjusting temperatures based on location. Some models boast smart learning capabilities, adapting to user preferences over time.

RTH9580WF provides Wi-Fi connectivity for remote control via a smartphone app. Manuals explain how to set up these features, optimizing energy usage and comfort. These features require proper configuration through the thermostat’s interface or the Honeywell Home app, enhancing convenience and efficiency.

Scheduling and Geofencing

Honeywell Round Thermostat Manuals explain how to program customized heating and cooling schedules, optimizing comfort and energy savings. Users can set different temperatures for various times of day and days of the week.

Geofencing, available on Lyric models, utilizes smartphone location to adjust the thermostat automatically. When you leave, it lowers the temperature; upon return, it restores your preferred setting. Manuals detail setup through the Honeywell Home app, ensuring efficient energy use and personalized comfort.

Smart Learning Capabilities

Certain Honeywell Round thermostats, particularly the Lyric series, boast Smart Learning features. Manuals detail how the thermostat observes your temperature adjustments over time, creating a personalized heating and cooling schedule without manual programming.

This adaptive learning optimizes energy efficiency and comfort. The thermostat learns your preferences and anticipates your needs, adjusting temperatures accordingly. Honeywell Home app access allows users to review and refine the learned schedule, ensuring optimal performance and a truly customized climate control experience;

Troubleshooting Common Problems

Honeywell Round thermostat manuals often dedicate sections to resolving frequent issues. A thermostat not responding typically requires checking battery levels or the circuit breaker. Inaccurate temperature readings may indicate improper placement, drafts, or a need for calibration, as outlined in the guide.

Further troubleshooting includes verifying wiring connections and ensuring compatibility with your HVAC system. Online forums and Honeywell Home support resources provide additional assistance. Detailed diagrams within the manual aid in diagnosing and fixing common problems, minimizing the need for professional service.

Thermostat Not Responding

If your Honeywell Round thermostat isn’t responding, the manual suggests several checks. First, verify the batteries are fresh and correctly installed. A tripped circuit breaker is another common cause; reset it if necessary. Examine the wiring connections, ensuring they are secure and haven’t loosened.

Consult the wiring diagram in your manual to confirm proper connections. If the display remains blank after these steps, the thermostat itself may be faulty, requiring replacement. Honeywell support resources offer further diagnostic guidance.

Inaccurate Temperature Readings

Honeywell Round thermostat displaying incorrect temperatures? The manual advises checking for drafts or direct sunlight impacting the sensor. Ensure the thermostat isn’t near heat sources like lamps or appliances. Calibration might be necessary; some models allow temperature offset adjustments within the settings menu – refer to your specific manual.

Verify the thermostat is level, as an uneven position can affect readings. If issues persist, a faulty temperature sensor may be the cause, potentially requiring professional repair or thermostat replacement. Consult Honeywell’s support for detailed troubleshooting.

Resources for Honeywell Thermostat Support

Honeywell provides extensive support for its round thermostats. The Honeywell Home website (home.honeywell.com) offers downloadable manuals, FAQs, and troubleshooting guides. Numerous online forums and communities, dedicated to home automation and Honeywell products, provide peer-to-peer assistance and solutions.

For direct support, Honeywell’s customer service team is available via phone or online chat. Searching online using your specific model number (e.g., T87N1018/U) often yields helpful results and dedicated support pages. Remember to have your model number ready when contacting support.

Honeywell Home Website

The Honeywell Home website (home.honeywell.com) serves as a central hub for round thermostat support. Users can locate detailed manuals, installation guides, and troubleshooting resources for various models, including discontinued ones. A comprehensive FAQ section addresses common issues and provides step-by-step solutions.

The site also features a product registration option, enabling access to personalized support and updates. Furthermore, Honeywell’s online support portal offers direct contact with customer service representatives via chat or phone, ensuring prompt assistance with any round thermostat related queries.

Online Forums and Communities

Numerous online forums and communities dedicated to smart home technology and Honeywell products offer valuable support for round thermostat owners. Platforms like Reddit’s r/smarthome and dedicated Honeywell forums host discussions where users share experiences, troubleshooting tips, and manual insights.

These communities often contain solutions to obscure problems not found in official documentation. Experienced users frequently assist others with wiring diagrams, programming advice, and identifying compatible accessories. Searching these forums can quickly yield practical solutions and a deeper understanding of your round thermostat.

sunbeam breadmaker model 5891 manual

Sunbeam Breadmaker Model 5891 Manual: A Comprehensive Guide

This manual provides detailed instructions for the Sunbeam Breadmaker Model 5891, ensuring optimal performance and delicious results. Explore features and recipes!

Congratulations on acquiring the Sunbeam Programmable Breadmaker, Model 5891! This appliance simplifies homemade bread creation, offering convenience and consistent results. This guide details operation, from initial setup to advanced customization. It’s designed for both novice and experienced bakers.

The 5891 boasts pre-programmed settings for white, whole wheat, and French bread, alongside custom options. Understanding its features unlocks a world of baking possibilities. Refer to this manual for troubleshooting and maintenance tips, ensuring years of enjoyable use. Explore delicious recipes!

Unboxing and Initial Setup

Carefully unpack your Sunbeam Breadmaker Model 5891, verifying all components are present. These include the breadmaker itself, the bread pan, and the mixing paddle. Before first use, wipe the machine housing with a damp cloth. Wash the bread pan and paddle with warm, soapy water, then dry thoroughly.

Place the breadmaker on a stable, level surface, away from water sources. Ensure adequate ventilation around the unit. A brief test run – without ingredients – is recommended to burn off any manufacturing residue. This ensures a fresh start for your baking adventures!

Component Identification

The Sunbeam Breadmaker Model 5891 consists of several key components. The main unit houses the heating element and mechanical parts. The bread pan, a non-stick coated container, holds the ingredients during baking. It’s crucial for loaf shape and easy removal. The mixing paddle, inserted into the base of the bread pan, kneads and mixes the dough.

Proper identification of these parts is essential for operation and maintenance. Familiarize yourself with their location and function before beginning the bread-making process. Regular cleaning of these components ensures longevity and optimal performance.

Bread Pan

The Sunbeam 5891’s bread pan is a vital component, crafted with a non-stick coating for effortless loaf removal. Ensure it’s securely locked into place before initiating any baking cycle. This pan’s capacity determines loaf size; always adhere to recommended ingredient levels.

Regular cleaning is paramount – hand wash with warm, soapy water after each use. Avoid abrasive cleaners that could damage the non-stick surface. Inspect for any scratches or damage, as this can affect baking performance and loaf quality.

Mixing Paddle

The Sunbeam 5891 utilizes a specialized mixing paddle to knead dough and ensure even ingredient distribution. Before each use, confirm the paddle is firmly attached to the drive shaft within the breadmaker. It’s crucial to remember that the paddle may sometimes remain lodged in the finished loaf – this is normal.

Carefully remove the paddle after baking, using a utensil if needed. Clean the paddle thoroughly with warm, soapy water, ensuring all dough residue is removed to prevent sticking during subsequent uses.

Understanding the Control Panel

The Sunbeam 5891’s control panel is designed for intuitive operation. Familiarize yourself with the display screen, which shows cycle time and settings, and the various function buttons. These buttons allow you to select pre-programmed settings like White, Whole Wheat, and French bread.

You can also customize your loaf by adjusting the crust color and loaf size. The control panel enables precise control over the bread-making process, ensuring consistent and delicious results every time.

Display Screen

The Sunbeam 5891’s display screen is a crucial component, providing real-time information throughout the bread-making cycle. It clearly indicates the current stage – kneading, rising, or baking – and the remaining time. The screen also displays selected settings, such as loaf size and crust color.

Error codes, if any, will appear on the screen, assisting in troubleshooting. A bright, easy-to-read interface ensures convenient monitoring of your bread’s progress.

Function Buttons

The Sunbeam 5891 Breadmaker features intuitive function buttons for effortless operation. These buttons allow you to select pre-programmed settings like White, Whole Wheat, and French bread. Dedicated buttons control loaf size and crust color adjustments, tailoring each bake to your preference.

Start/Stop, Menu, and Hour/Minute buttons provide complete control. Understanding each button’s function is key to unlocking the full potential of your breadmaker and achieving perfect results every time.

Basic Bread Making: Quick Bread Recipe

Begin your bread-making journey with this simple recipe for the Sunbeam 5891. Combine 1 ¼ cups warm water, 3 cups bread flour, 2 tablespoons sugar, 1 ½ teaspoons salt, and 2 ¼ teaspoons active dry yeast in the bread pan. Select the ‘Basic’ setting, a 1.5-pound loaf size, and medium crust color.

Press start and enjoy freshly baked bread in under four hours! This recipe provides a foundation for exploring more complex flavors and techniques with your new breadmaker.

Using Pre-Programmed Settings

The Sunbeam 5891 offers convenient pre-programmed settings for various bread types. The ‘White Bread’ setting is ideal for classic loaves, while ‘Whole Wheat’ caters to healthier options. For a crispier crust and distinct flavor, utilize the ‘French Bread’ setting.

Each setting automatically adjusts kneading, rising, and baking times. Simply select your desired setting, add ingredients, and press start for perfectly baked bread every time. Experiment with these settings to discover your favorites!

White Bread Setting

The Sunbeam 5891’s ‘White Bread’ setting is designed for traditional loaves, delivering a soft texture and classic flavor. This program automatically manages the entire baking process – kneading, rising, and baking – for optimal results. It’s perfect for beginners and those seeking consistent, reliable bread making.

For best results, use bread flour with a protein content of 12-14%. Ensure accurate ingredient measurements, following a trusted recipe. This setting typically produces a 1.5 or 2-pound loaf, depending on your selected loaf size.

Whole Wheat Setting

The ‘Whole Wheat’ setting on your Sunbeam 5891 Breadmaker is specifically calibrated for the unique characteristics of whole wheat flour. This program extends the kneading and rising times to fully develop the gluten, resulting in a lighter, more flavorful loaf.

Using 100% whole wheat flour can yield a denser bread; consider blending with bread flour for a softer texture. Accurate measurements are crucial, and a slightly higher liquid ratio may be needed. Expect a 1.5 or 2-pound loaf, based on your size selection.

French Bread Setting

The ‘French Bread’ setting on your Sunbeam 5891 Breadmaker is designed to create a loaf with a crisp crust and a slightly chewier interior, mimicking traditional French bread. This program utilizes a higher initial kneading speed and a shorter rising time.

For best results, use bread flour with a higher protein content. A smaller loaf size is recommended for optimal crust development. Avoid adding excessive ingredients, as they can affect the texture. Expect a golden-brown crust and a delightful aroma!

Customizing Your Bread

The Sunbeam 5891 allows for personalized bread making! You can easily adjust settings to achieve your desired loaf. Experiment with crust color – choose from light, medium, or dark – to suit your preference. Loaf size is also customizable, offering options for 1.5lb, 2lb, and 2.5lb loaves.

Don’t be afraid to modify ingredient amounts slightly to fine-tune the flavor and texture. Remember to document your changes for consistent results in future baking endeavors. Enjoy the creative process!

Adjusting Crust Color

The Sunbeam Breadmaker Model 5891 offers three crust color settings: light, medium, and dark. Use the “Crust Color” button on the control panel to cycle through these options before starting the baking cycle. A lighter crust results in a softer exterior, while a darker crust provides a more robust flavor and texture.

Consider the type of bread you’re making; delicate breads benefit from a lighter setting. Experiment to discover your ideal crust shade – it’s a key element of personalized bread making!

Adjusting Loaf Size

The Sunbeam Breadmaker Model 5891 allows you to select between 1.5-pound and 2-pound loaf sizes. Utilize the “Loaf Size” button on the control panel to choose the appropriate size before initiating the baking process. A smaller loaf is ideal for smaller households or quick breads, while a larger loaf suits families or sandwiches.

Remember to adjust ingredient quantities proportionally to the selected loaf size for optimal results. Consistent loaf size selection ensures even baking and a perfect texture.

Ingredient Guidelines and Measurements

Successful bread making relies on accurate measurements. Always use fresh ingredients for the best flavor and texture. Liquid ingredients should be measured precisely using liquid measuring cups, while dry ingredients benefit from using dry measuring cups and leveling off with a straight edge.

Proper ingredient order is crucial; liquids first, then dry, followed by yeast. Refer to specific recipes for precise quantities, as variations impact the final product. Consistent measurements yield consistent results!

Flour Types

Different flours yield varied bread textures. Bread flour, with its higher protein content, creates a chewier loaf due to increased gluten development. All-purpose flour is versatile, suitable for many recipes, offering a softer crumb. Whole wheat flour adds a nutty flavor and denser texture, benefiting from added liquid.

Experimenting with flour blends can enhance flavor and texture. Rye flour contributes a distinctive taste, while gluten-free flours require specific adjustments for optimal results. Always consider the flour’s protein content!

Yeast Selection

Proper yeast selection is crucial for successful bread making. Active dry yeast requires proofing in warm water with a pinch of sugar before use, ensuring viability. Instant yeast, also known as bread machine yeast, can be added directly to the dry ingredients, simplifying the process.

Ensure your yeast isn’t expired, as this impacts rising. Store yeast in an airtight container in a cool, dry place. Using the correct amount, as specified in recipes, is vital for optimal loaf volume and texture.

Step-by-Step Bread Making Process

Begin by adding liquid ingredients to the bread pan, followed by dry ingredients, ensuring yeast doesn’t directly contact salt. Place the bread pan into the machine and select your desired program. The machine will automatically knead, rest, and bake the bread.

Monitor the kneading stage; adjust liquid if dough is too dry or add flour if too wet. Avoid opening the lid during baking, as this can affect rising. Once complete, carefully remove the loaf using oven mitts.

Adding Ingredients in the Correct Order

For optimal results with your Sunbeam 5891, always add ingredients in the recommended order: liquids first, then dry ingredients. This ensures proper mixing and activation. Specifically, pour in water, oil, or milk, followed by sugar, salt, and finally, flour.

Create a small well in the flour and add the yeast last, preventing direct contact with the salt. This order is crucial for successful kneading and rising, leading to a perfectly baked loaf.

Kneading and Rising Stages

The Sunbeam 5891 automatically handles kneading and rising. During kneading, the paddle develops gluten, creating bread’s structure. Observe through the viewing window; kneading typically lasts 10-20 minutes. Next, the rising stage allows the dough to proof, increasing in volume.

This can take 30-60 minutes, depending on the recipe and room temperature. Avoid opening the lid during rising to maintain consistent warmth. The machine manages these stages seamlessly, ensuring a light and airy loaf.

Troubleshooting Common Issues

If your bread doesn’t rise, ensure the yeast is fresh and properly activated. Check ingredient measurements, especially yeast and liquid ratios. A stuck paddle indicates too much flour or a dense dough; use slightly less flour next time.

If the bread collapses, reduce the liquid amount. For uneven baking, rotate the bread pan halfway through the cycle. Always consult the manual for specific error codes and solutions related to your Sunbeam 5891.

Bread Not Rising

A common issue is inactive yeast; verify its expiration date and proper activation in warm water with a pinch of sugar. Insufficient yeast quantity also causes this problem – precisely measure according to the recipe. Cold liquid temperatures hinder yeast activity, so use lukewarm water.

Ensure ingredients are added in the correct order, as specified in the Sunbeam 5891 manual. Excessive salt can inhibit yeast growth, so measure carefully. A drafty environment can also affect rising; ensure the breadmaker is in a warm location.

Paddle Stuck in Bread

If the kneading paddle remains lodged within the loaf after baking, allow the bread to cool completely before attempting removal. Gently use a non-metallic utensil, like a wooden or silicone spatula, to carefully dislodge the paddle. Avoid excessive force, which could damage the bread pan’s non-stick coating.

Ensure the paddle is securely attached before each baking cycle, following the Sunbeam 5891 manual’s instructions. Occasionally, a slightly wetter dough can cause increased adhesion; adjust liquid measurements in future recipes.

Cleaning and Maintenance

Regular cleaning extends the life of your Sunbeam Breadmaker Model 5891. Always unplug the machine before cleaning. The bread pan and kneading paddle are dishwasher-safe, or can be washed by hand with warm, soapy water. Avoid abrasive cleaners, which can damage the non-stick coating.

Wipe the machine housing with a damp cloth. Never immerse the main unit in water. Ensure all parts are thoroughly dry before reassembling. Consistent maintenance guarantees optimal performance and delicious baked goods for years to come.

Cleaning the Bread Pan

After each use, remove the bread pan from your Sunbeam Breadmaker Model 5891. Allow it to cool completely before handling. The non-stick coating makes cleaning easy; simply wash with warm, soapy water and a soft sponge. For stubborn residue, soak the pan for a short period.

The bread pan is also dishwasher-safe for convenient cleaning. Avoid using abrasive cleaners or scouring pads, as these can damage the non-stick surface. Thoroughly dry the pan before storing or reusing.

Cleaning the Machine Housing

To maintain your Sunbeam Breadmaker Model 5891’s appearance, wipe the exterior housing with a damp cloth. Never immerse the breadmaker base in water or any other liquid. Ensure the appliance is unplugged before cleaning. A mild dish soap solution can be used for tougher stains, but avoid harsh chemicals.

Pay attention to the control panel area, gently removing any crumbs or spills. Dry the housing thoroughly with a soft cloth after cleaning to prevent damage and ensure longevity;

Safety Precautions

Always ensure the Sunbeam Breadmaker Model 5891 is unplugged before cleaning or when not in use. Never immerse the base in water. Keep the cord away from hot surfaces. Do not operate the appliance with a damaged cord or plug.

Supervise children when the breadmaker is in operation. Avoid touching hot surfaces, like the bread pan, during or immediately after baking. Use caution when removing the hot loaf. This appliance is for household use only.

Recipe Ideas Beyond Basic Bread

Expand your culinary horizons with the Sunbeam Breadmaker Model 5891! Explore sweet bread recipes like cinnamon raisin or banana nut bread, perfect for breakfast or dessert. Utilize the dough-only setting for homemade pizza dough, rolls, or even pastries.

Experiment with savory additions like herbs, cheese, or olives. The possibilities are endless! Remember to adjust ingredient quantities based on loaf size preferences. Enjoy creating diverse and delicious baked goods beyond simple loaves.

Sweet Bread Recipes

The Sunbeam Breadmaker Model 5891 excels at sweet bread recipes! Try a classic Cinnamon Swirl, adding cinnamon and sugar to the dough before the second rise. Banana Nut Bread is another favorite, incorporating mashed bananas and chopped walnuts. For a decadent treat, explore Chocolate Chip bread, using high-quality chocolate chips.

Adjust sugar levels to your preference and consider adding a glaze after baking. Remember to use the ‘Sweet’ or ‘Cake’ setting for optimal results. Enjoy freshly baked, delightful sweet breads!

Dough-Only Recipes

The Sunbeam Breadmaker Model 5891 isn’t just for loaves! Utilize the ‘Dough’ setting for versatile creations. Perfect for homemade pizzas, simply shape and bake the dough after the cycle completes. Cinnamon rolls are another excellent option, allowing for a fluffy, flavorful base.

You can also craft bagels, pretzels, or even pastries. Remember to adjust ingredient quantities slightly for optimal dough consistency. This setting provides a convenient starting point for all your baking adventures!

Understanding Error Codes

The Sunbeam Breadmaker Model 5891 utilizes error codes to signal potential issues. An “Err 1” typically indicates a power interruption during operation, requiring a restart. “Err 2” suggests a temperature sensor malfunction, potentially needing service. If you encounter “Err 3”, it often means the kneading motor is overloaded – reduce dough ingredients.

“Err 4” signifies a heating element problem, and “Err 5” points to a lid closure issue. Consult the full manual for a complete list and troubleshooting steps before contacting customer support.

Replacing Parts

Maintaining your Sunbeam Breadmaker Model 5891 sometimes requires part replacements. Replacement paddles are crucial for proper kneading; search online retailers using the model number. Finding a compatible bread pan is also essential for loaf shape and size. Always ensure the replacement parts are specifically designed for the 5891 model.

Check Sunbeam’s official website or authorized dealers for genuine parts. Avoid using non-approved components to prevent damage or malfunction.

Where to Find Replacement Paddles

Locating replacement paddles for your Sunbeam Breadmaker Model 5891 is straightforward. Online marketplaces like Amazon and eBay frequently stock compatible parts. Searching with the model number “5891” ensures correct fit. Appliance parts retailers, both online and brick-and-mortar stores, are also excellent sources. Sunbeam’s official website may offer direct purchase options or links to authorized distributors.

Always verify the paddle’s compatibility before ordering to avoid issues.

Bread Pan Replacements

Finding replacement bread pans for the Sunbeam Breadmaker Model 5891 requires a bit of searching, but options are available. Online retailers specializing in appliance parts, such as Amazon and specialized appliance websites, often carry compatible pans. Using the model number “5891” in your search is crucial for ensuring a proper fit. Checking Sunbeam’s official website for parts or authorized retailers is also recommended.

Confirm dimensions before purchase.

Warranty Information

The Sunbeam Breadmaker Model 5891 typically comes with a limited one-year warranty covering manufacturing defects in materials and workmanship. This warranty doesn’t cover damage resulting from misuse, accidents, or unauthorized repairs. Proof of purchase, such as a dated sales receipt, is essential for warranty claims. To initiate a claim, contact Sunbeam Customer Support (details provided elsewhere in this manual).

Review the full warranty details included with your purchase.

Frequently Asked Questions (FAQ)

Q: Why isn’t my bread rising? A: Ensure your yeast is fresh and properly activated. Check ingredient measurements and room temperature. Q: Can I stop the cycle to add ingredients? A: Generally, no. Follow the recipe’s order carefully. Q: What if the paddle gets stuck? A: Turn off and unplug the machine before attempting removal.

Q: Where can I find more recipes? A: Explore online resources and Sunbeam’s website.

Sunbeam Customer Support Contact Information

For assistance with your Sunbeam Breadmaker Model 5891, please consult the official Sunbeam website for comprehensive support resources. Direct contact information, including phone numbers and email addresses, may vary. Visit their support page for the most current details. You can often find helpful FAQs and troubleshooting guides online.

Additionally, explore online forums and communities dedicated to Sunbeam appliances for peer-to-peer assistance.

Manual Download Location

Access the complete Sunbeam Breadmaker Model 5891 manual online for convenient reference; Several websites archive appliance manuals, offering downloadable PDF versions. A direct link to the official Sunbeam support page, hosting the instruction manual, is highly recommended. Ensure the downloaded file corresponds specifically to Model 5891 to avoid compatibility issues.

Keep a digital copy for easy access and future reference during bread-making endeavors.

Related Sunbeam Breadmaker Models

If you’re exploring alternatives or upgrades, several other Sunbeam breadmaker models share similar functionalities with the 5891. Consider the Sunbeam 16-Cup Multi-Purpose Rice Cooker (CKSBRC165-033) for versatile cooking. Other programmable Sunbeam models offer varying capacities and pre-set programs. Researching these options can help you find a machine perfectly suited to your baking needs and preferences.

Explore features and compare specifications for informed decision-making.

social media strategy sample pdf

Social Media Strategy Sample PDF: A Comprehensive Plan

Craft a robust social media strategy utilizing this step-by-step template, available in multiple formats like Word, Google Docs, and PDF, to guide your efforts.

A well-defined social media strategy is crucial for businesses aiming to thrive in today’s digital landscape. This document serves as your comprehensive guide, outlining the ‘why’ behind your social presence and detailing a clear path to achieving your marketing objectives.

Before diving into platform-specific tactics, understanding the core purpose of your strategy is paramount. This template helps you articulate why a social media strategy is essential for your company, defining its overall purpose and aligning it with broader business goals.

It’s about more than just posting; it’s about building relationships, increasing brand awareness, driving website traffic, and ultimately, boosting conversions. This introduction sets the stage for a focused and effective approach to social media marketing.

Why You Need a Social Media Strategy Document

Without a documented social media strategy, efforts can become fragmented and ineffective. A clear plan ensures all activities are aligned with your business objectives, maximizing return on investment. This template provides structure, preventing wasted time and resources on tactics that don’t deliver results.

A strategy document facilitates consistent branding and messaging across all platforms. It defines your target audience, brand voice, and content pillars, ensuring a cohesive online presence. Furthermore, it allows for measurable results, tracking KPIs and demonstrating the value of your social media efforts.

Ultimately, a well-crafted document transforms social media from a time-consuming task into a powerful business asset, driving growth and fostering lasting customer relationships.

Social Media Audit: Assessing Your Current Presence

Before launching a new social media strategy, a thorough audit is crucial. This involves taking stock of your existing accounts – identifying what’s working, what isn’t, and where improvements are needed. Analyze current account performance, examining metrics like engagement, reach, and follower growth.

The audit extends to competitor analysis, identifying best practices and opportunities to differentiate your brand. Evaluate their content, posting frequency, and audience interaction. This assessment provides a baseline understanding of your current standing and informs future strategy development.

A comprehensive audit ensures your strategy builds upon existing strengths and addresses weaknesses, maximizing its potential for success.

Current Account Performance Analysis

Begin by meticulously examining each of your existing social media profiles. Focus on key metrics such as follower count, engagement rate (likes, comments, shares), reach, and website click-throughs. Analyze posting frequency and identify peak performance times for optimal content delivery.

Evaluate content types – which formats (images, videos, stories) resonate most with your audience? Assess the overall brand consistency across platforms. Identify any accounts that are underperforming or inactive, and determine if they align with your overall strategy.

Document these findings to establish a clear baseline for measuring future progress and refining your approach.

Competitor Analysis: Identifying Best Practices

Select three to five key competitors within your industry and thoroughly analyze their social media presence. Examine their content strategy – what types of posts are they creating, and how frequently? Note their engagement rates, follower growth, and overall brand voice.

Identify which platforms they prioritize and how they tailor their content to each channel. What hashtags are they using effectively? Look for gaps in their strategy where you can differentiate yourself.

Document their successes and failures to glean valuable insights and inform your own strategy, adapting best practices to your unique brand identity.

Defining Your Target Audience

Understanding precisely who you’re trying to reach is foundational. Begin by outlining the demographics – age, location, gender, income, education, and occupation – of your ideal customer. However, go beyond basic demographics; delve into psychographics.

Explore their interests, values, pain points, and online behaviors. What motivates them? What are their challenges? Where do they spend their time online? This detailed understanding will shape your content, messaging, and platform choices.

Prioritize creating detailed audience personas to represent segments of your target audience, bringing them to life and ensuring focused efforts.

Creating Detailed Audience Personas

Develop fictional, yet realistic, representations of your ideal customers. Each persona should embody a specific segment of your target audience, going beyond demographics to include motivations, goals, and behaviors.

Give each persona a name, a job title, a background story, and even a photo. Detail their challenges, pain points, and what they hope to achieve. What social media platforms do they frequent? What type of content resonates with them?

These personas will serve as a constant reference point, ensuring your content and messaging are always tailored to the needs and interests of your core audience.

Understanding Audience Behavior on Each Platform

Recognize that audience behavior varies significantly across different social media channels. What works on TikTok won’t necessarily resonate on LinkedIn, and vice versa.

Investigate how your target audience uses each platform – are they primarily consuming content, actively engaging in discussions, or seeking customer support? What time of day are they most active? What content formats do they prefer (videos, images, articles)?

Analyzing these nuances is crucial for optimizing your content strategy and maximizing engagement. Tailor your approach to align with the unique characteristics of each platform and the expectations of its users.

Setting SMART Social Media Goals

Establish clearly defined goals using the SMART framework: Specific, Measurable, Achievable, Relevant, and Time-bound. Avoid vague aspirations like “increase brand awareness.” Instead, aim for “increase website traffic from Facebook by 15% in Q2.”

Align these goals with your overall business objectives. Are you aiming to generate leads, drive sales, improve customer service, or build a community? Each goal should contribute to a larger strategic outcome.

Document your SMART goals within your social media strategy document, providing a benchmark for measuring success and demonstrating the return on investment of your efforts.

Platform Selection: Choosing the Right Channels

Identify the platforms where your target audience is most active. Don’t spread yourself too thin by trying to be everywhere at once. Focus on channels that deliver the highest potential return.

Consider demographics and content formats. Facebook excels for broad reach and community building, while Instagram thrives on visual content. LinkedIn is ideal for professional networking and B2B marketing, and TikTok caters to younger audiences with short-form video.

Prioritize platforms based on your goals and resources. A well-executed strategy on two or three channels is more effective than a half-hearted effort across many.

Facebook Strategy Considerations

Leverage Facebook’s broad reach for brand awareness and community engagement. Utilize a mix of content formats – images, videos, links, and live streams – to keep your audience engaged.

Focus on building a community through interactive posts, questions, and contests. Facebook Groups can foster deeper connections with your target audience. Consider Facebook advertising to extend your reach beyond organic followers.

Analyze Facebook Insights to understand audience demographics, post performance, and engagement rates. Tailor your content strategy based on these data-driven insights for optimal results.

Instagram Strategy Considerations

Prioritize visually appealing content – high-quality images and videos are crucial for Instagram success. Utilize Instagram Stories for behind-the-scenes glimpses, polls, and interactive content, fostering immediate engagement.

Harness the power of relevant hashtags to increase discoverability and reach a wider audience. Explore Instagram Reels for short-form video content, capitalizing on current trends and challenges.

Engage with followers through comments, direct messages, and collaborations with influencers. Track key metrics like likes, comments, shares, and follower growth to refine your strategy and maximize impact.

LinkedIn Strategy Considerations

Focus on professional networking and thought leadership content. Share industry insights, company updates, and articles that demonstrate expertise and build credibility.

Engage with relevant groups and participate in industry discussions to expand reach and connect with potential clients or partners. Utilize LinkedIn Articles to publish longer-form content and establish yourself as an authority.

Leverage employee advocacy by encouraging staff to share company content and engage with their networks. Track metrics like impressions, engagement, and website clicks to measure the effectiveness of your LinkedIn strategy.

TikTok Strategy Considerations

Embrace short-form video content that is authentic, engaging, and trend-driven. Participate in popular challenges and utilize trending sounds to increase visibility and reach a wider audience.

Focus on creating visually appealing and entertaining videos that capture attention quickly. Experiment with different video formats, such as tutorials, behind-the-scenes glimpses, and user-generated content.

Collaborate with TikTok influencers to promote your brand and reach new audiences. Monitor key metrics like views, likes, shares, and comments to assess the performance of your TikTok content and refine your strategy accordingly.

Content Planning & Calendar Creation

Develop a detailed content calendar outlining planned posts across all selected platforms. This calendar should specify content type, publishing dates, times, and accompanying visuals. Mapping out content in advance ensures a consistent flow of engaging material.

Consider incorporating a variety of content formats – images, videos, stories, live streams – to maintain audience interest. Align content with established content pillars and brand messaging guidelines for a cohesive brand presence.

Utilize scheduling tools to automate posting and optimize timing for maximum reach. Regularly review and adjust the content calendar based on performance data and emerging trends, ensuring agility and relevance.

Brand Voice and Messaging Guidelines

Establish a consistent brand voice that reflects your company’s personality and values. These guidelines should detail tone, language style, and overall communication approach across all social media channels.

Define key messaging points that resonate with your target audience and reinforce your brand identity. Ensure all content aligns with these core messages, creating a unified and recognizable brand narrative.

Document specific “do’s and don’ts” regarding language, imagery, and content themes. This clarity empowers all team members to represent the brand effectively and maintain consistency in every interaction.

Content Pillars: Defining Core Themes

Identify 3-5 core themes, or “content pillars,” that represent your brand’s expertise and resonate with your target audience. These pillars will serve as the foundation for your content strategy, ensuring relevance and focus.

Each pillar should align with your overall business goals and address the interests and needs of your audience. Examples include industry insights, product tutorials, customer success stories, or behind-the-scenes glimpses.

Develop content ideas that fall under each pillar, creating a diverse and engaging content calendar. This structured approach ensures a consistent flow of valuable content and strengthens your brand’s authority.

Key Performance Indicators (KPIs) & Measurement

Determine the key performance indicators (KPIs) crucial for gauging your social media strategy’s success. These metrics should directly correlate with your SMART goals, providing quantifiable evidence of progress.

Essential KPIs include engagement rate (likes, comments, shares), reach and impressions, website traffic from social media, lead generation, and conversion rates. Track these metrics consistently using platform analytics and social media management tools.

Regular reporting and analysis are vital. Review KPI data to identify what’s working, what’s not, and make data-driven adjustments to optimize your strategy for maximum impact and return on investment.

Social Media Advertising Strategy

Develop a targeted social media advertising strategy to amplify your reach and achieve specific campaign objectives. This involves defining your advertising goals, identifying target audiences, and selecting appropriate ad formats on each platform.

Consider utilizing platform-specific ad features like Facebook Ads Manager, Instagram Ads, LinkedIn Campaign Manager, and TikTok Ads Manager. A/B testing different ad creatives and targeting options is crucial for optimization.

Allocate your budget strategically across platforms based on audience demographics and campaign goals. Continuously monitor ad performance and adjust bids and targeting to maximize return on ad spend (ROAS).

Budget Allocation Across Platforms

Strategic budget allocation is vital for maximizing ROI. Begin by analyzing each platform’s potential to reach your target audience and achieve campaign objectives. Prioritize platforms where your audience is most active and engaged.

Consider allocating a larger portion of your budget to platforms demonstrating higher conversion rates or offering more granular targeting options. Facebook and Instagram often receive significant investment due to their broad reach.

Allocate funds for A/B testing different ad creatives and targeting parameters. Regularly review performance data and reallocate budget based on results, shifting funds to higher-performing campaigns and platforms.

Crisis Communication Plan

Develop a detailed plan to address potential negative situations swiftly and effectively. This should outline clear roles, responsibilities, and pre-approved messaging for various crisis scenarios. Identify potential risks – negative reviews, public backlash, or security breaches – and prepare responses.

Establish a monitoring system to detect emerging issues promptly. Designate a crisis communication team with authority to make decisions and disseminate information. Prioritize transparency and honesty in all communications, acknowledging the issue and outlining steps taken to resolve it.

Utilize social media to provide updates, address concerns, and control the narrative. Regularly review and update the plan based on lessons learned and evolving risks.

Staff Roles and Responsibilities

Clearly define roles for each team member involved in social media execution. Assign responsibilities such as content creation, community management, analytics reporting, and advertising campaign management. Identify a social media manager to oversee the overall strategy and ensure brand consistency.

Outline approval processes for content publication, ensuring alignment with brand guidelines and legal compliance. Establish escalation procedures for handling sensitive issues or negative feedback. Provide training to all staff on social media best practices, brand voice, and crisis communication protocols.

Document these roles and responsibilities in a comprehensive guide for easy reference and accountability.

Social Media Policy Template Integration

Incorporate a comprehensive social media policy template to guide employee behavior and protect the company’s reputation. This policy should outline acceptable use guidelines, confidentiality protocols, and legal considerations. Address personal versus professional use of social media, emphasizing the need to distinguish between individual opinions and official company statements.

Include guidelines on handling sensitive information, respecting copyright laws, and avoiding defamation. Ensure the policy covers potential risks like data breaches and phishing scams. Regularly update the policy to reflect evolving social media landscapes and legal requirements.

Distribute the policy to all employees and require acknowledgment of understanding.

Tools for Social Media Management

Leverage social media management tools to streamline workflows and enhance efficiency. Consider platforms like Hootsuite, Buffer, or Sprout Social for scheduling posts, monitoring brand mentions, and analyzing performance data. Explore content creation tools like Canva for visually appealing graphics and Adobe Spark for video editing.

Utilize listening tools to track conversations about your brand and industry trends. Employ analytics dashboards to measure key performance indicators (KPIs) and refine your strategy. Investigate tools offering competitive analysis features to benchmark against rivals.

Remember to select tools aligning with your budget and team’s technical expertise.

Reporting and Analysis Schedule

Establish a consistent reporting schedule to track progress and demonstrate the return on investment (ROI) of your social media efforts. Implement weekly reports focusing on key metrics like engagement, reach, and website traffic. Conduct monthly analyses to identify trends, assess content performance, and refine targeting strategies.

Prepare quarterly comprehensive reports summarizing overall performance, highlighting successes, and outlining areas for improvement. Share these reports with stakeholders to maintain transparency and secure continued support. Utilize data visualization tools to present findings clearly and concisely.

Regular analysis ensures your strategy remains effective and aligned with business objectives.

Implementation Timeline & Action Plan

Develop a detailed timeline outlining key milestones for implementing your social media strategy. Break down the plan into actionable steps with assigned owners and deadlines. Prioritize tasks based on impact and feasibility, starting with foundational elements like profile optimization and content calendar creation.

Schedule regular check-ins to monitor progress and address any roadblocks. Allocate sufficient time for content creation, community engagement, and advertising campaign management. Ensure alignment with overall marketing initiatives and business goals.

A well-defined action plan ensures efficient execution and maximizes the impact of your social media efforts.

Appendix: Example Social Media Content

Include a diverse range of content examples to illustrate your brand voice and content pillars. Showcase posts tailored for each platform – Facebook, Instagram, LinkedIn, and TikTok – demonstrating optimal formats and messaging. Provide examples of engaging visuals, compelling captions, and relevant hashtags.

Feature content that aligns with your SMART goals, such as promotional posts, educational articles, behind-the-scenes glimpses, and user-generated content. Demonstrate how to adapt content for different audience segments.

This appendix serves as a practical resource for your team, ensuring consistent and effective content creation.

Review and Revision Process for the Strategy

Establish a regular schedule – quarterly, or bi-annually – for reviewing and revising your social media strategy. Assess performance against KPIs, analyzing what’s working and what isn’t. Gather feedback from your team and stakeholders to identify areas for improvement.

Document all revisions, noting the rationale behind changes. Ensure the strategy remains aligned with overall business objectives and evolving market trends. Consider incorporating new platform features or addressing emerging challenges.

A living document, your strategy should adapt to maximize impact and maintain relevance.