Wrist Size Guide: Finding the Perfect Fit
Knowing your wrist size is surprisingly crucial, potentially saving you money on accessories! Online watch purchases often begin with this measurement, ensuring a comfortable and aesthetically pleasing fit.
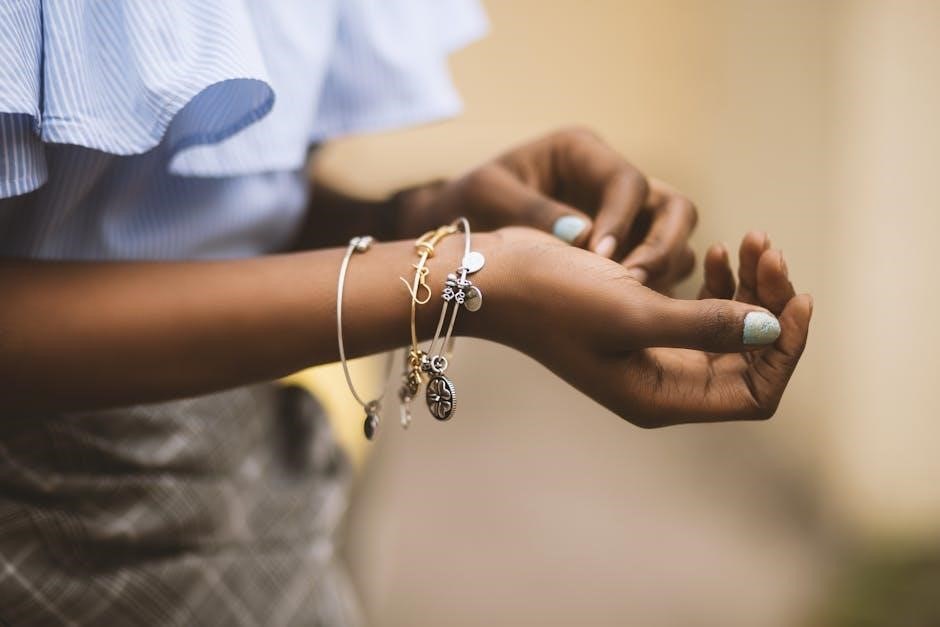
Even when selecting bracelets or watches, understanding your wrist circumference eliminates guesswork and frustration, leading to a more satisfying experience with your chosen jewelry.
Why Wrist Size Matters
Accurate wrist sizing is paramount for both comfort and style when selecting a watch or bracelet. A poorly fitted timepiece can feel awkward, restrictive, or even cause discomfort during daily activities. Beyond mere comfort, wrist size significantly impacts the overall aesthetic balance of the accessory.
Watches that are too large can overwhelm a smaller wrist, appearing disproportionate and visually jarring. Conversely, a watch that’s too small might get ‘lost’ on a larger wrist, lacking the presence it deserves. Finding the right proportion ensures the watch complements, rather than dominates, your overall look.
Furthermore, bracelet fit directly affects how securely and comfortably it rests on your skin. A bracelet that’s too loose can slide around, while one that’s too tight can restrict circulation and cause irritation. Prioritizing accurate measurement leads to a more enjoyable and confident wearing experience.
Impact on Watch Aesthetics

The visual harmony between a watch and the wearer’s wrist is profoundly influenced by size. A watch’s perceived size shifts dramatically depending on the wrist it adorns; what looks sleek on one person might appear bulky on another.
For individuals with smaller wrists, opting for watches with smaller case diameters (typically under 40mm) and thinner profiles creates a more balanced and refined appearance. Larger watches can overwhelm the wrist, disrupting the overall proportion. Conversely, those with larger wrists can confidently pull off larger timepieces, even those exceeding 44mm.

Beyond diameter, consider the lug-to-lug measurement – the distance between the strap attachment points. This impacts how the watch sits on the wrist, ensuring it doesn’t overhang. A well-proportioned watch enhances the wearer’s style, while a mismatched size can detract from it.
Impact on Bracelet Comfort
A properly sized bracelet is paramount for all-day comfort. Too tight, and it restricts blood flow, causing discomfort and potential skin irritation. Too loose, and it slides around, feeling insecure and potentially snagging on clothing.
Wrist size directly dictates the necessary bracelet length. Metal bracelets offer adjustability through removable links, allowing for a customized fit. Leather or fabric straps often have limited adjustment options, making accurate wrist measurement even more critical.
Consider the clasp style; some clasps add extra length to the bracelet. Charm bracelets, with their added weight, require a snugger fit to prevent excessive movement. Ignoring wrist size can lead to constant readjustments or, worse, an uncomfortable and impractical accessory. Prioritizing comfort ensures you can enjoy your bracelet without distraction.

How to Measure Your Wrist Size
Accurate measurement is key to finding the perfect fit! This section details simple methods using common household items, ensuring a comfortable and stylish accessory experience.
Tools You’ll Need
Fortunately, determining your wrist size doesn’t require specialized or expensive equipment! The most accurate tool is a flexible measuring tape, commonly found in sewing kits or fabric stores. These tapes are designed to conform to the curves of your wrist, providing a precise measurement.
However, if a flexible measuring tape isn’t readily available, don’t worry! A simple piece of string, floss, or even a strip of paper will suffice. These alternatives allow you to mark your wrist’s circumference and then measure the length with a standard ruler or rigid measuring tape.
A pen or marker is also helpful when using string or paper to clearly indicate where to cut or measure. Finally, having a friend assist can make the process easier, especially when reaching around to measure your own wrist. With these readily available tools, accurately determining your wrist size is a straightforward process.
Step-by-Step Measurement Guide
Begin by relaxing your wrist and arm. Avoid flexing or tensing your muscles, as this can alter the measurement. Position your arm comfortably, as if you were naturally wearing a watch. Wrap the measuring tool – whether it’s a flexible tape, string, or paper – snugly around your wrist, where you would typically wear a watch.
Ensure the measuring tool isn’t too tight, restricting circulation, nor too loose, creating excessive space. If using string or paper, mark the point where the ends overlap to create a complete circle. Remove the measuring tool and lay it flat against a ruler or measuring tape.
Record the measurement in inches or millimeters, depending on your preference and the scale of your measuring tool. Repeat the process a couple of times to ensure consistency and accuracy. Averaging multiple measurements can help minimize errors.
Measuring with a Flexible Measuring Tape
Using a flexible measuring tape is the most straightforward method. Ensure the tape measure is designed for body measurements, offering some flexibility for accurate contouring. Begin by locating the bony prominence on the wrist side of your hand. Position the ‘0’ mark of the tape measure against this point.
Wrap the tape snugly, but not tightly, around your wrist, maintaining a parallel alignment with the floor. Avoid pulling the tape excessively, as this can compress the wrist and yield an inaccurate reading. Read the measurement where the tape overlaps with the ‘0’ mark.
Record the measurement in either inches or millimeters, depending on your preference. Double-check the reading to confirm its accuracy. It’s helpful to have someone assist you with this process, ensuring the tape remains level and properly positioned during measurement.
Using String or Paper
If a flexible measuring tape isn’t available, a piece of string or a strip of paper will suffice. Wrap the string or paper snugly around your wrist, mirroring the process used with a measuring tape – locate the wrist bone and ensure a comfortable, not constricting, fit.
Mark the point where the string or paper overlaps. Carefully remove the string or paper and lay it flat against a ruler or yardstick. Measure the length from the starting point to the marked overlap point, recording the measurement in your preferred units.
This method requires a bit more precision than using a measuring tape, so take your time. It’s beneficial to repeat the process a couple of times to ensure consistency and accuracy in your final measurement. Remember to avoid stretching the string or paper during measurement.
Getting an Accurate Reading
Accuracy is paramount when measuring your wrist; a slight error can lead to an ill-fitting watch or bracelet. Ensure the measuring tape or string is snug, but not overly tight – you should be able to comfortably slide a finger underneath. Avoid pulling the tape too taut, as this will result in a smaller measurement.
Measure at the wrist bone, as this is the point where most watch bands and bracelets will sit. Take several measurements to confirm consistency. If there are variations, average the readings to obtain the most precise size.
It’s helpful to have someone assist you, especially when using a measuring tape, to ensure proper positioning and a secure, yet comfortable, fit. Round your final measurement to the nearest millimeter or quarter inch for optimal results.

Wrist Size Chart & Common Sizes
Typical wrist sizes vary, but understanding ranges is key. Men’s averages generally fall between 6.5 and 7.5 inches, while women’s tend to be 5.5 to 6.5 inches.

Average Wrist Sizes for Men
Determining the average wrist size for men involves considering a spectrum, as individual measurements naturally differ. However, a commonly cited range places the average male wrist circumference between 6.5 and 7.5 inches. This doesn’t mean every man falls within this bracket; variations are entirely normal and influenced by factors like height, build, and genetics.
A wrist measuring under 6 inches would be considered small for a man, while those exceeding 8 inches would be categorized as large. The 6.5-7.5 inch range represents the most frequently observed measurements. It’s important to remember that these are simply averages, and comfort and aesthetic preference ultimately dictate the ideal watch or bracelet size.
Accurate measurement is crucial for selecting accessories that complement a man’s physique. Ignoring wrist size can lead to ill-fitting items that appear disproportionate or feel uncomfortable. Therefore, taking the time to measure correctly is a worthwhile investment when purchasing wristwear.
Average Wrist Sizes for Women
Establishing average wrist sizes for women reveals a generally smaller circumference compared to men, though considerable individual variation exists. The typical range for a woman’s wrist falls between 5.5 and 6.5 inches. As with men, this is a statistical average, and many women will have wrists outside of this specific measurement.
Wrist sizes below 5 inches are considered small for women, while those above 7 inches are categorized as large. The 5.5-6.5 inch range represents the most commonly observed measurements. Factors like body frame, height, and genetics all contribute to these differences.
When selecting bracelets or watches, understanding a woman’s wrist size is paramount for achieving a comfortable and visually balanced fit. An improperly sized accessory can appear awkward or feel restrictive. Precise measurement ensures a more satisfying and flattering experience with chosen jewelry.
Understanding Size Ranges
Interpreting wrist size ranges is crucial for selecting appropriately sized watches and bracelets. These ranges aren’t rigid boundaries, but rather guidelines to help determine the best fit. A “small” wrist, typically under 6 inches, requires careful consideration of watch case diameter and lug-to-lug length.
“Medium” wrists, spanning 6 to 7 inches, offer greater flexibility in watch size choices, accommodating a wider variety of styles. “Large” wrists, 7 inches and above, can generally handle larger, more substantial timepieces without appearing disproportionate.
It’s important to remember that these are general recommendations. Personal preference plays a significant role; some individuals may prefer a larger watch even with a smaller wrist, and vice versa. Understanding these ranges provides a starting point for finding a comfortable and aesthetically pleasing fit.
Watch Size Recommendations Based on Wrist Size

Selecting the right watch size hinges on your wrist’s dimensions. Smaller wrists benefit from smaller cases, while larger wrists can accommodate bolder designs for optimal style.
Watches for Small Wrists (Under 6 inches)
For wrists measuring under 6 inches, prioritizing proportion is key. Overly large watches can appear cumbersome and uncomfortable. Generally, case diameters between 36mm and 38mm are ideal, offering a balanced and refined look.
Consider watches with thinner profiles to minimize bulk. Lug-to-lug measurements should also be carefully considered; shorter lugs prevent the watch from extending beyond the wrist’s edges. Smaller watch faces and streamlined designs contribute to a more harmonious aesthetic.
Vintage-inspired watches often feature smaller case sizes, making them excellent choices. Avoid overly thick or heavily textured bracelets, as these can overwhelm a smaller wrist. Focus on elegance and subtlety – a delicate timepiece will complement, rather than dominate, your frame. Ultimately, comfort and visual balance are paramount.
Watches for Medium Wrists (6-7 inches)
Individuals with wrists between 6 and 7 inches enjoy significant versatility in watch selection. This size range accommodates a broad spectrum of styles and case diameters, offering ample opportunity for personal expression.
Watches with case sizes ranging from 38mm to 42mm generally provide a balanced and proportional appearance. Both classic and modern designs work well, allowing for exploration of diverse aesthetics. Consider the lug-to-lug measurement to ensure a comfortable fit, avoiding overhang.
Experiment with different strap materials and widths to find what best suits your preference. A medium-sized wrist can comfortably support both dress watches and more robust sports models. Don’t be afraid to try different styles, but always prioritize a watch that feels secure and visually harmonious with your wrist’s dimensions.
Watches for Large Wrists (7 inches and above)
For wrists measuring 7 inches or greater, larger watch cases generally create a more balanced and proportionate look. Smaller watches can appear undersized and lack the visual impact desired by many wearers.
Watches with case diameters of 44mm and above are often ideal, allowing the timepiece to command attention without looking disproportionate. Bold designs and substantial bracelets complement larger wrists effectively. Pay close attention to the lug-to-lug measurement; a longer lug-to-lug ensures the watch doesn’t dig into the sides of the wrist.
Larger wrists can comfortably handle thicker cases and wider straps. Don’t shy away from exploring dive watches or pilot-style watches, as their robust construction and substantial size are well-suited for this wrist size. Prioritize comfort and ensure the watch feels secure and balanced throughout the day.

Bracelet Size Guide
Determining the correct bracelet length is vital for both comfort and style. Adjustable options offer versatility, while charm bracelets require careful consideration of weight and fit.
Determining Bracelet Length
Accurately measuring for bracelet length ensures a comfortable and secure fit. Begin by measuring your wrist snugly with a flexible measuring tape, noting the circumference in inches or millimeters. Then, add the desired ease – typically between 0.5 to 1 inch (1.27 to 2.54 cm) – depending on how loosely you prefer your bracelet to sit.
For a classic fit, add 0.5 inches; for a more relaxed fit, add 1 inch. Consider the bracelet’s style; wider bracelets may require additional ease. Some bracelets are sized using standard lengths like 6.5, 7, 7.5, or 8 inches.
When selecting a bangle-style bracelet, ensure it can easily slide over your hand – the widest point is usually the knuckles. If you’re between sizes, it’s generally best to choose the larger size for comfort. Remember that chain bracelets can often be adjusted by adding or removing links, offering a customized fit.
Adjustable Bracelet Options
Fortunately, many bracelet designs offer adjustability, accommodating slight variations in wrist size and providing a more versatile fit. Chain bracelets are prime examples, easily altered by adding or removing links – a jeweler can perform this service, or some bracelets include tools for self-adjustment.
Sliding knot bracelets, often crafted from cord or leather, allow for on-the-go adjustments, ensuring a comfortable fit throughout the day. Stretch bracelets, made with elastic cord, offer inherent flexibility, conforming to your wrist size without clasps or closures.
Look for bracelets with extender chains, providing a range of lengths to choose from. Hook-and-eye closures with multiple settings also offer adjustability. When considering adjustable options, prioritize quality construction to ensure the mechanism remains secure and reliable over time.
Charm Bracelet Considerations
Charm bracelets present unique fitting challenges due to the added weight and bulk of the charms. A bracelet that fits comfortably without charms might become too tight once fully adorned, restricting movement and causing discomfort.
When selecting a charm bracelet, opt for a slightly looser fit than you would with a standard bracelet, allowing room for the charms to move freely. Consider the weight distribution of the charms; heavier charms can pull the bracelet down, requiring a more secure and potentially larger size.
Pay attention to the clasp security – a robust clasp is essential to prevent accidental openings, especially with a weighted bracelet. Regularly check the bracelet’s links for wear and tear, as the added weight can accelerate deterioration; Start with a few charms and gradually add more, assessing the fit and comfort at each stage.

Factors Affecting Perceived Size
Beyond wrist circumference, lug-to-lug distance, case thickness, and dial size dramatically influence how a watch appears on your wrist, impacting overall aesthetics.
Lug-to-Lug Measurement
Understanding lug-to-lug measurement is paramount when selecting a watch, as it directly impacts how the watch head sits on your wrist. Unlike case diameter, which only measures the watch face, lug-to-lug defines the total length of the watch from the tip of one lug to the other.
A watch with a lug-to-lug measurement exceeding your wrist width can appear oversized and uncomfortable, potentially causing the lugs to overhang and dig into your skin. Conversely, a watch with a significantly shorter lug-to-lug measurement might look disproportionately small on a larger wrist.
To determine the ideal lug-to-lug measurement, accurately measure your wrist circumference and aim for a watch where the lug-to-lug distance is roughly equivalent to, or slightly less than, your wrist size. This ensures a balanced and harmonious appearance, enhancing both comfort and style. Prioritizing this measurement alongside case size is crucial for a perfect fit.
Case Thickness
Case thickness, often overlooked, significantly influences a watch’s overall presence and comfort, especially concerning wrist size. A bulky, thick case can feel unwieldy and uncomfortable, particularly for individuals with smaller wrists, disrupting the watch’s balance and potentially snagging on clothing.
Conversely, a thinner case generally offers a more streamlined and elegant profile, suitable for various wrist sizes and styles. However, extremely thin cases might appear delicate or lack the robust presence some prefer.
When considering case thickness, balance it with the case diameter and lug-to-lug measurement. A larger diameter watch can sometimes accommodate greater thickness, while a smaller watch benefits from a slimmer profile. Ultimately, prioritize a thickness that feels comfortable and proportionate to your wrist and personal aesthetic preferences, ensuring a harmonious fit and enjoyable wearing experience.
Dial Size
The dial size, or the diameter of the watch face, plays a critical role in legibility and overall aesthetic balance relative to wrist size. A dial that’s too large can overwhelm a smaller wrist, appearing disproportionate and visually clunky, while a dial that’s too small might be difficult to read at a glance.
Generally, a dial size proportionate to the case diameter is ideal. Consider the spacing between the dial elements – numerals, indices, and hands – as this impacts readability. Larger dials often accommodate more complex features and details, but can also appear busier.
For smaller wrists, dials in the 36-40mm range are often a good choice, while larger wrists can comfortably wear dials up to 44mm or even larger. Prioritize a dial size that allows for clear time reading without feeling overwhelming or lost on your wrist, contributing to both functionality and style.